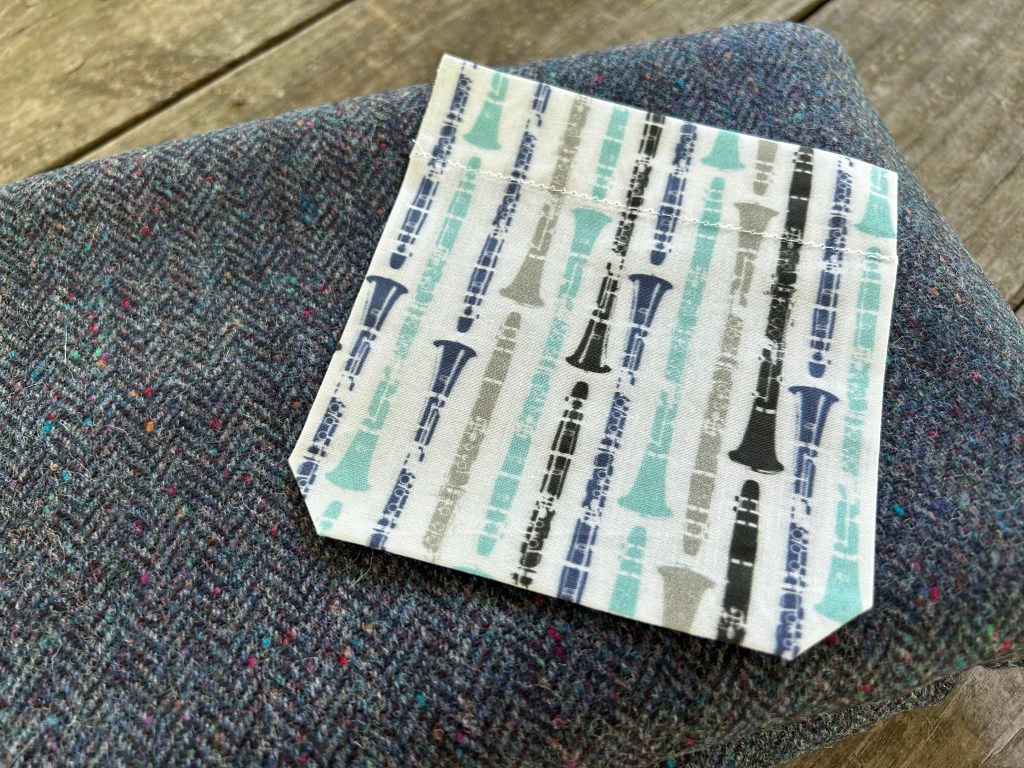
We are two weeks closer to my friend’s wedding now and while I am making progress on a shirt, I still do not have an outfit to wear. I was able to complete a muslin for my button-up earlier this week which allowed me to confirm the modifications I needed to make to the pattern, and late last night I finally finished cutting out all of the (twenty eight!) pattern pieces so that I can begin sewing. (Please pardon the midnight craft room lighting in the following photos.)

I tend to be excessively meticulous when cutting out pattern pieces, but I try to find joy in the process. For example, rather than using pins or pattern weights to hold my pieces in place, I use a collection of rocks I gathered from the creek to help me.

And while it does take me a while to cut out all of the pieces I need, there is nothing more satisfying than seeing it all come together in the end. The pattern printed on this fabric is not symmetrical, which irritated me at the beginning but I had to let go of that. Even still, I did manage to get the center front of the shirt to line up pretty nicely.
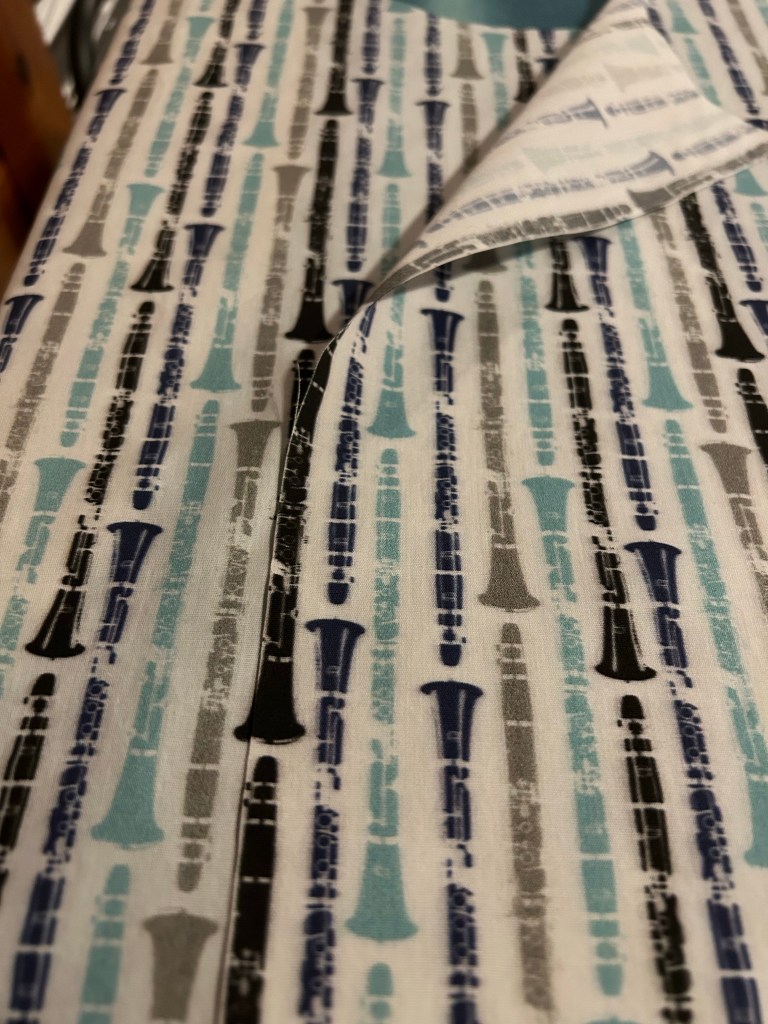
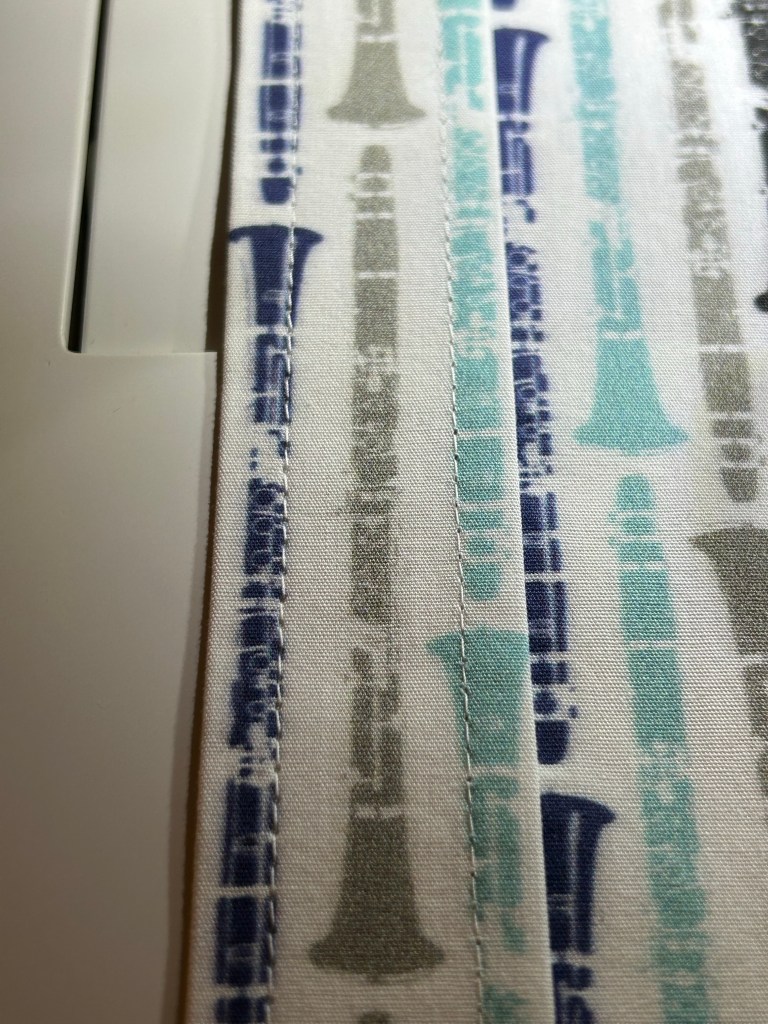
Now that I have the pieces ready to go, I have done just a bit of sewing to create the front plackets. I cannot tell you how excited I was to discover that after stitching along either side of the button band, I saw that the lines of stitching fell perfectly along the edge of the clarinets on either side of the center line. Have you ever seen anything more beautiful?? I didn’t think so.
I hope now that I’m at this stage in the project, the rest of it will go fairly quickly. It looks like this pattern calls for a couple fiddly techniques and very precise pressing, but I am going to forge ahead and get this done as fast as I can. I haven’t even begun thinking about making a muslin for my waistcoat yet and I hope I have enough time to pull that together, but I’m not going to stress about it right this minute. I realized this morning that, while having a shirt will be nice, I also don’t have any pants to wear to the wedding. Nor do I have buttons for the waistcoat. And it just occurred to me that I don’t have a gift for the couple yet, either! I better get moving. (Side note: why are weddings so expensive??) What I do have now is the wool fabric for my waistcoat if I have time to get to it. Kyle has assured me that the colors go well together, so I no longer have to worry about that particular detail.
Speaking of color, because I don’t have enough going on in my crafting life at the moment, I have also begun experimenting with natural dyeing. This is something that I have wanted to pursue for a while and had already begun collecting books and resources before we even moved to North Carolina so that I could absorb as much information as possible. I joined a natural dyeing Facebook group, as well as a group all about native plants of North Carolina so that I could get a head start on identifying what was around me when we moved here. I have also been collecting skeins of natural, cream-colored wool for several years. I love the idea of using the native plants from this area to create a color palette on wool that reflects the natural world that surrounds us. I had, however, been feeling overwhelmed by the sheer volume of information and what felt like a very involved process and I was also somewhat paralyzed by my desire for perfection so I hadn’t jumped in yet because doing so felt very daunting. That is until my intrepid friend Katie ambushed me when we went over to spend the evening at her house recently. When we arrived, she handed me a bucket and said “go pick some marigolds, we’re going to dye fabric.” She of course knew about my hesitation to get started, and we had previously talked about how her fearless willingness to play without overthinking things was an incredible strength in character that I do not possess and that I could use some of that in my life. So thank you, Katie! I will always credit you for giving me the push that I needed to start playing around, and I am excited to do some more dyeing together!
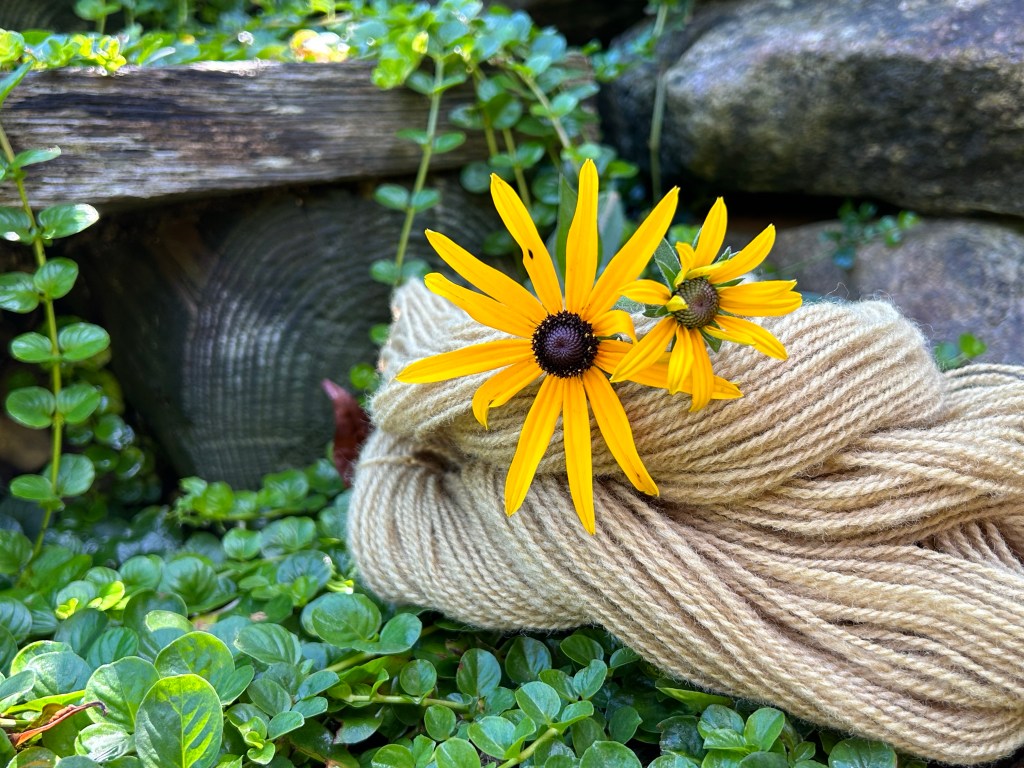
The first skein of yarn I dyed was honestly pretty underwhelming to begin. The process of preparing the yarn to dye takes several hours to scour and mordant the wool. Then, with this particular batch of dye material, I had to boil the plants for two hours, then let it sit for 24 hours, then simmer it for another hour before adding the yarn and simmering for another hour before letting the yarn cool completely in the dye bath. This is not a fast process, and after an hour of simmering the wool in the dye bath, this was the result I had:

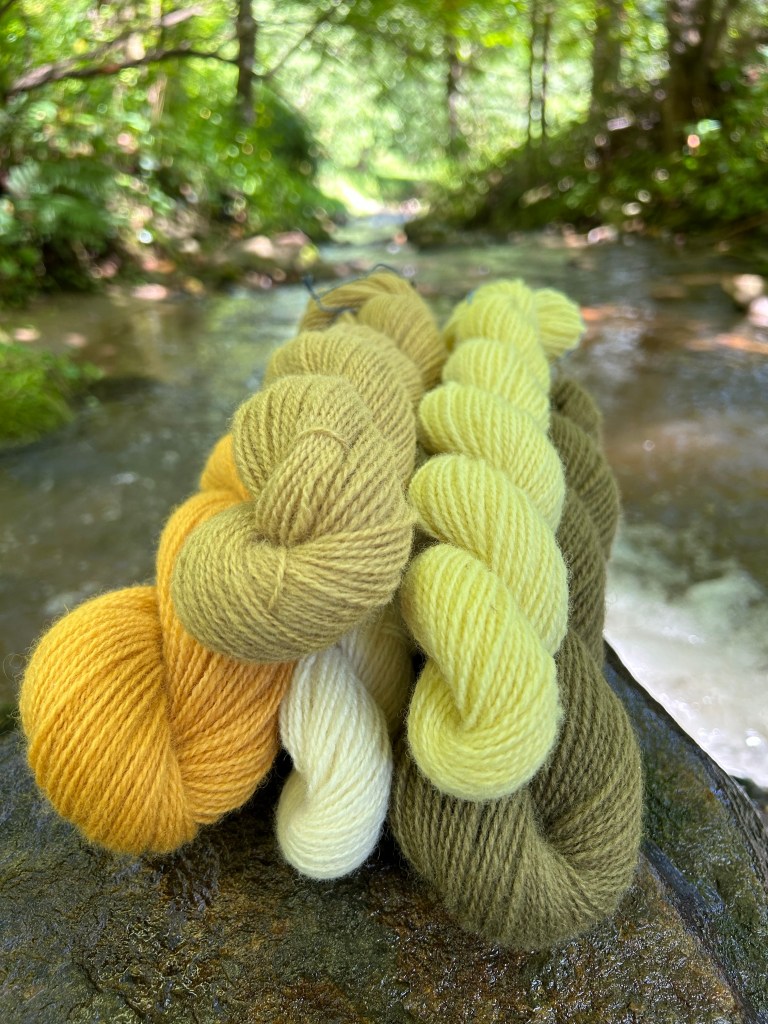
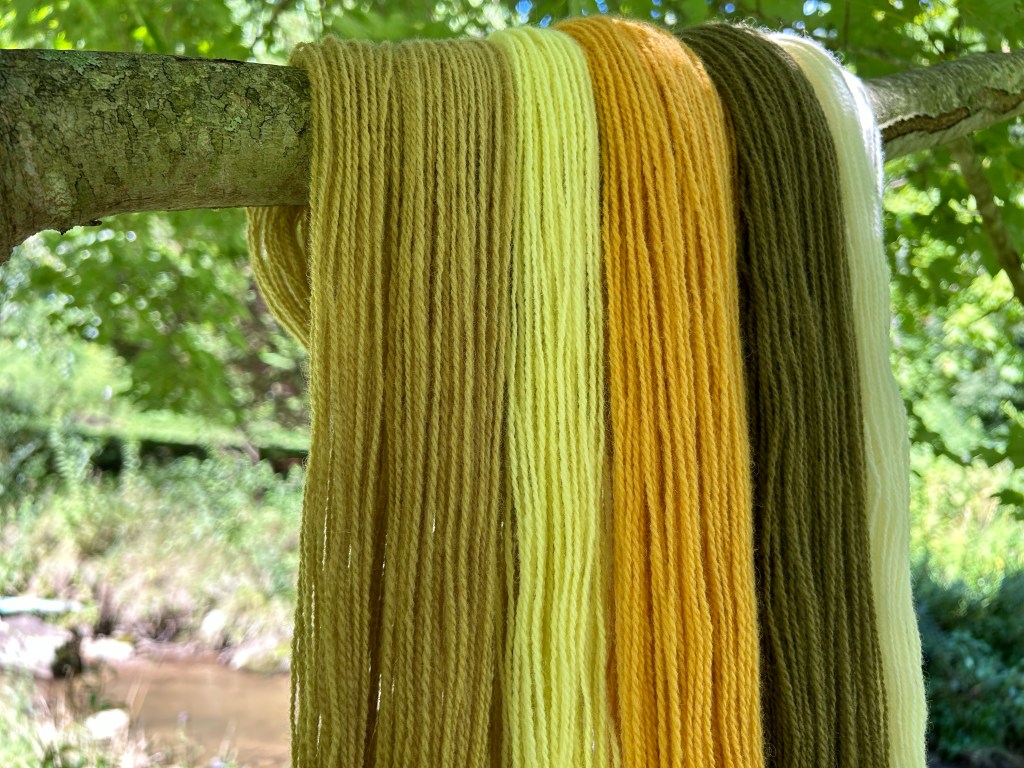
This was neither the color I expected, nor was it an impressive result that encouraged me to continue playing around. But, after letting the yarn soak in the dye bath overnight I really did end up with a nice milky brown that Kyle keeps calling “cappuccino”. Not a vibrant color, but a nice neutral that will come in handy. This skein was dyed using the stems and leaves (no flowers) from Black-Eyed Susan. The flowers, if used separately, should give a different color which I am looking forward to trying.
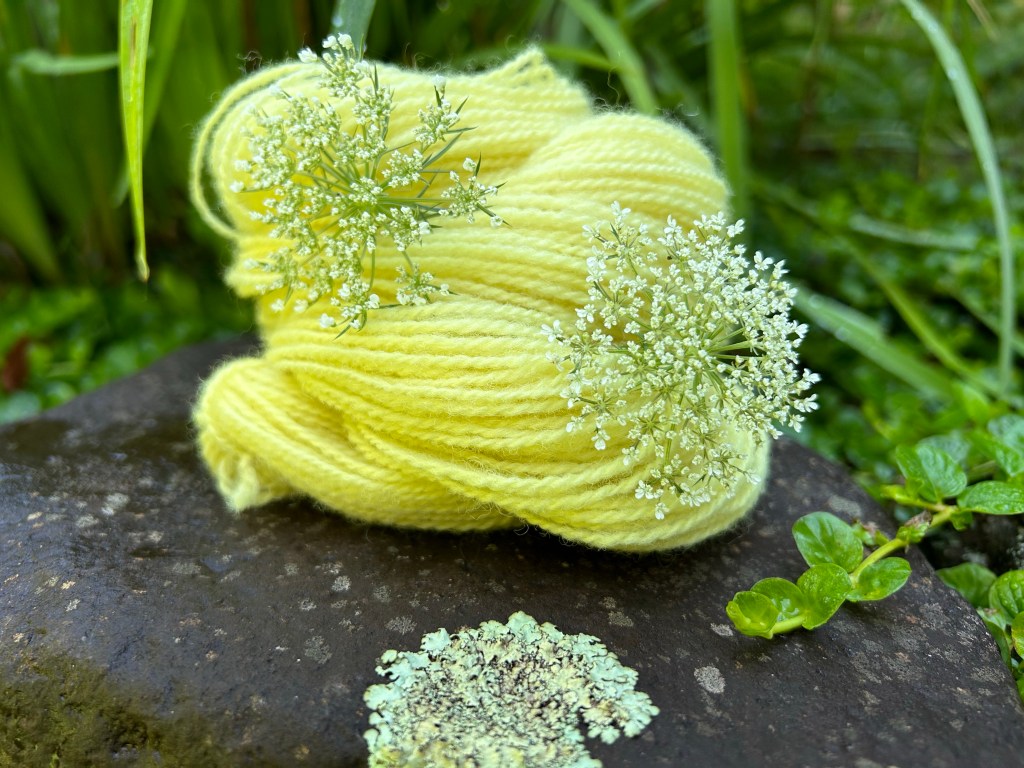
I had thought the one skein was going to be enough to get me started and satiate my immediate interest in playing around, but with Queen Anne’s Lace blooming and the window to harvest the flowers coming to an end, I acted quickly to gather some up and get another dye pot simmering. Surprisingly, these delicate white flowers gave me a really beautiful buttery yellow.
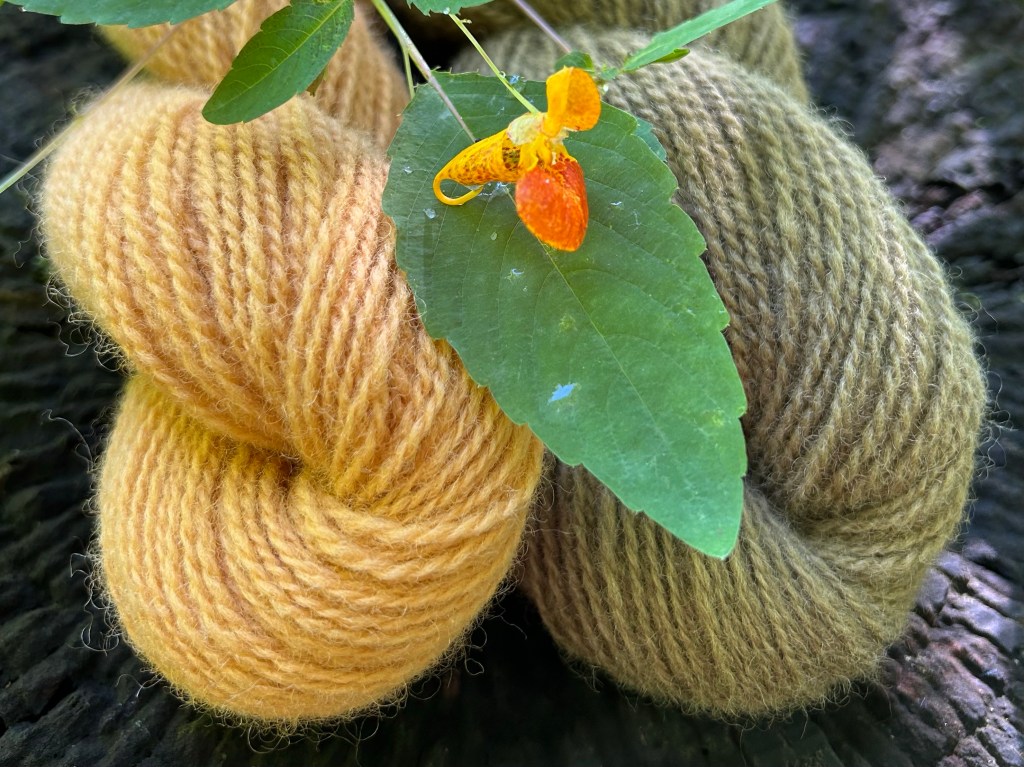
Feeling more confident now, and having just discovered via Tiktok that Jewelweed can also be used as a dye source, I was eager to keep going. This time, I wanted to try dyeing two skeins. Both skeins I dyed in the jewelweed dye bath first, then I removed one skein and added ferrous sulfate to the remaining dye bath. Iron is frequently used as a modifier to change the resulting color of the dye. I was once again shocked and very pleasantly surprised to see the colors I was able to produce from a plant that is growing so abundantly on our property!
I think I am going to have a lot of fun as I continue to explore the possibilities around me.
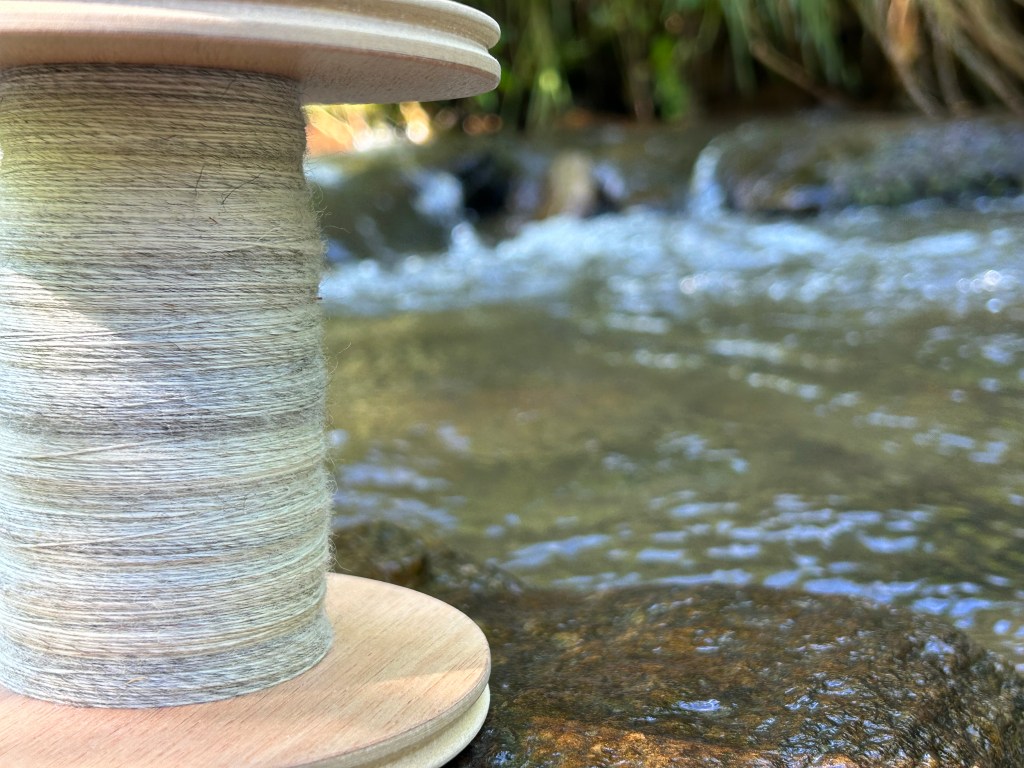
I may even consider dyeing over some of my handspun yarn in the future as well. I finished spinning the 100g of gray Shetland that I processed and really was sad to see it come to an end. It was a very satisfying project and fun to spin. I am looking forward to working more with wool that I prepare by hand to spin. And I think this gorgeous heathered gray would be a beautiful base to give complex, dimensional colors when overdyed.
But for now, I must focus and return to the sewing machine, otherwise this Cinderella will not be going to a ball next month.


Leave a reply to petkennedy Cancel reply