A snow day and a cancelled meeting have blessed me with some time to sit down and write a quick update again. I know I have been absent since we were hit by Helene over two months ago now, but I’m hoping to settle back into some sort of routine and normalcy. This snow is a good reminder to stay home, stay safe, and hunker down by the fire. I always love the peaceful quiet that snow brings.
Though I have been absent from the blog, I haven’t stopped my crafting and although it’s unusual for me to have THREE posts in a row with finished towels for sale, that seems to be the case this time around. I hope I don’t make a habit of it because it means I’m visiting the blog far too infrequently. I have always intended for this place to primarily be a personal account of my crafting life here in WNC and don’t want it to become so shop-focused.
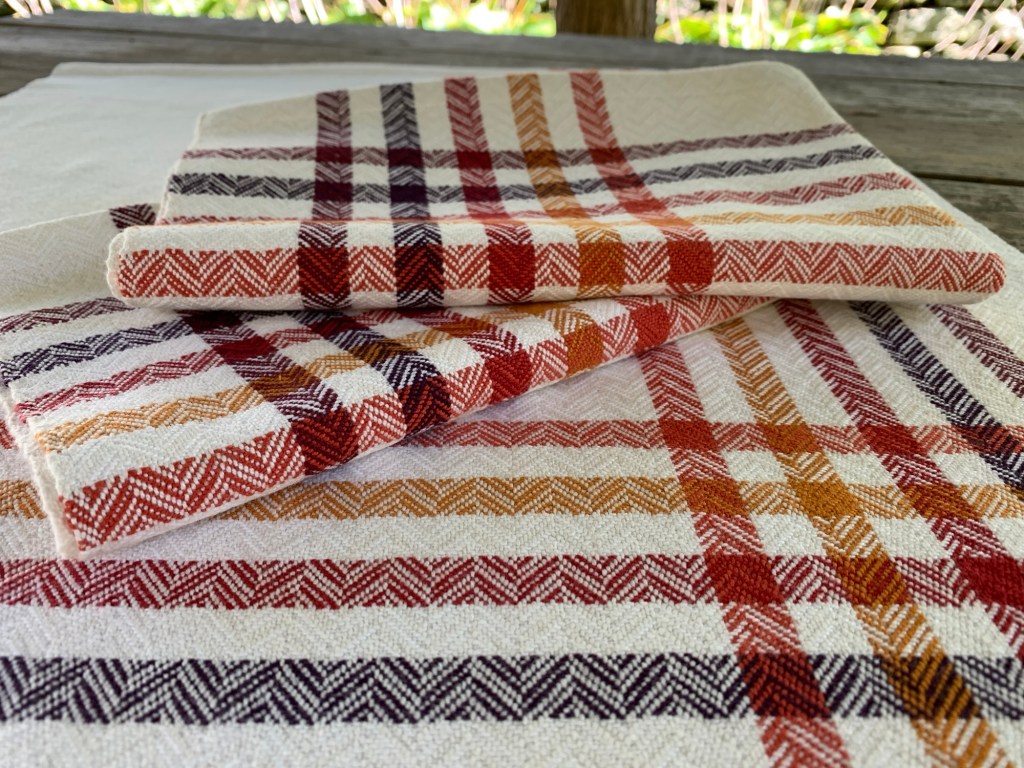
Be that as it may, I do want to share some finished towels that are now live on Etsy. These will be my last batch of towels for 2024, so if you are looking for holiday gifts, be sure to grab a few before they’re gone!
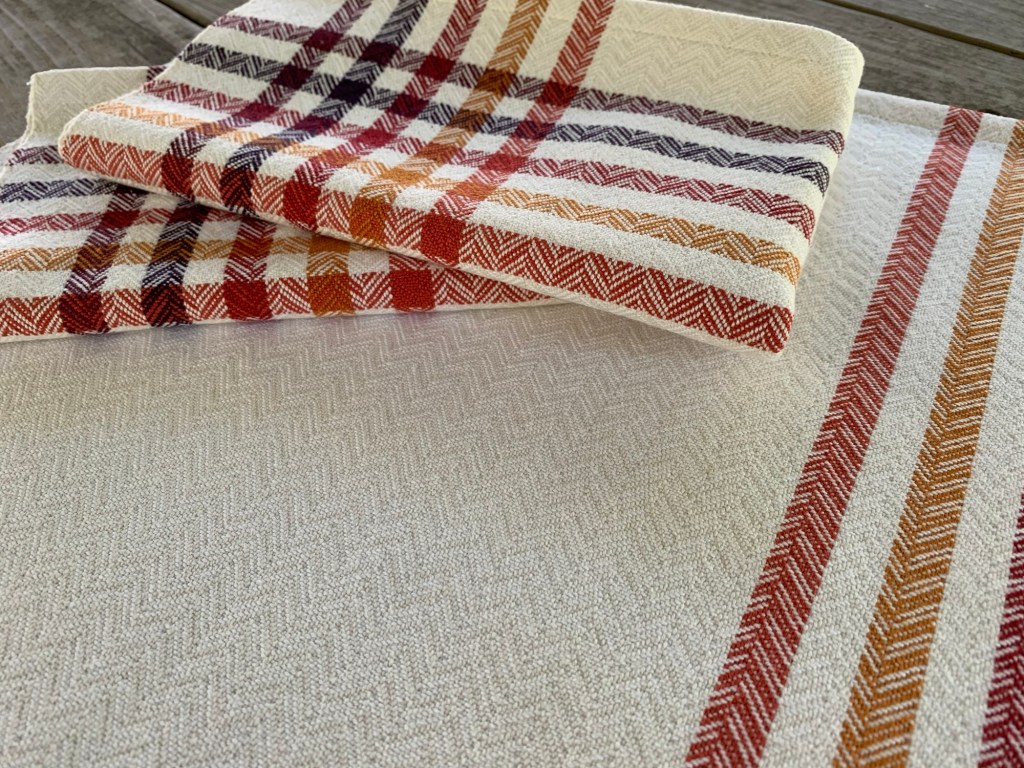
This is my first time revisiting a design that I have already woven, and I was really happy to come back to it. These were the very first towels I ever designed back in 2022, and also my first listing on Etsy.

In looking over my project notes just now, I have officially woven over 100 towels since the last time I wove this pattern. I was very unsure at the time whether anybody else would see the value in what I make, and I had been so hesitant to even open an Etsy shop and I just can’t tell you how heartwarming and truly humbling it is to know that there are other people out there who get it. Who know that making things by hand is so special, and is more than just the end result, and is not the same as store-bought.
Because I was so unsure whether anybody would want a towel, I only made five of them for my first listing. I thought maybe, if I was lucky, that they would sell within a few months. They sold in a few days. So the next time I made towels, I made 10 and really had to fight the voice in the back of my head that said “that’s too many. The first time was a fluke.” And they sold, so I made 10 more. Then 12. Then 15. Then I listed two batches of 15 at the same time. And I was so flabbergasted each and every time an order came in. It truly makes me giddy every time my phone dings with a new order. Weaving, like all of my fiber crafts, is something that I pursued simply because it interested me, because I love textiles, because I enjoy making things with my hands and I am so happy that I am able to share my love and care and passion with others.
15 towels was the maximum I was able to make with one warp due to the limitations of the tools I had available to me. Be warned, from here on out we’re going to dive into some behind-the-scenes weaving nerdiness so for those of you who don’t care to read on, the long story short is that I can now weave more than 15 towels! One of the most common ways to measure a warp, and the method I was using, is to use what’s called a “warping board.” It is a rectangular frame with pegs all around the perimeter, and by following a certain path back and forth you are able to measure the length of warp that you need for your project – one end at a time. My warping board was large enough that I could just eke out a 16-yard warp if I made use of every single peg, which then allowed me to weave about 15 towels of whatever design I was working on before I ran out of warp length.

Recently, however, I bit the bullet and invested in a few additional tools that allow me to wind much longer lengths onto my loom, thus allowing me to weave more towels before running out. What that means is that for the batch of towels I have just listed, I was able to weave 42 towels instead of just 15! Which is excellent because 17 of them were already spoken for before I even had a chance to create a listing for them.
The warping method I used for these towels, and the one I plan to use for the majority of my towel projects going forward, is called “sectional warping.” Instead of measuring the entire length of the warp, one end at a time, and then transferring the full width of ends (about 600 ends for most of my towels) to my loom, sectional warping allows me to wind all of the ends I need for a 1-inch section at the same time, directly onto the warp beam of the loom so I don’t have to transfer it later. This allows me to work in bouts, and because I am winding directly onto the warp beam, I can wind much longer sections because I am no longer limited by the size of the warping board. In order to do this, you need a few specialty tools: a spool rack to hold multiple spools of warp threads; a tension box to keep those ends organized, evenly spaced, and under consistent tension; and a sectional beam on the loom to neatly contain each section of the warp as you wind it on.
When I bought my loom, it already had a sectional beam installed which set me up well for this project. This beam had spacers every two inches instead of every inch, which is no better or worse, it just means that you wind bouts that are 2″ wide instead of 1″ wide. When I make towels, I weave them with 24 ends per inch in the warp. Knowing that I would be winding 2″ bouts, I went searching for a spool rack that could hold at least 48 spools. I was surprised by how difficult that was, with many spool racks on the market only holding 30 or 45 spools. However, the makers of my loom – Macomber – also make a spool rack that holds 60 spools which is exactly what I needed.
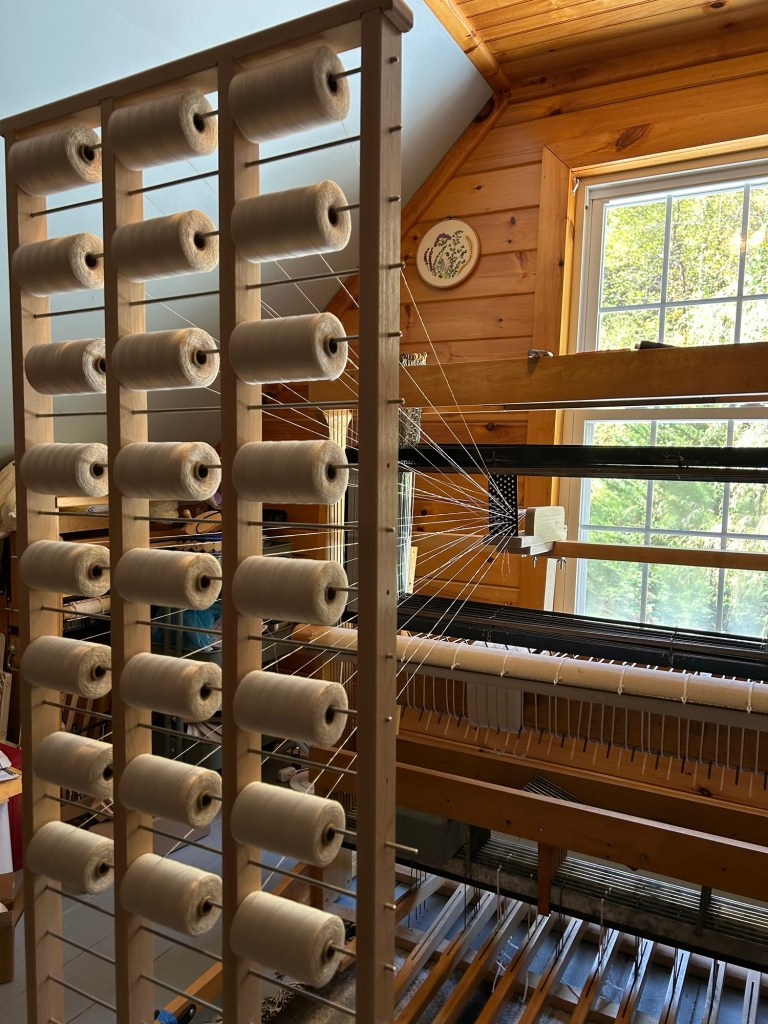
The issue, as I soon discovered, is that the cotton spools I use for my warp are too big to be able to fill each row on the rack, so I had to space them out to every other row, effectively reducing my capacity to only 30 spools. I then had two options: either I could wind each spool onto multiple smaller bobbins (thus creating a lot of extra work and reducing efficiency), or I could modify my sectional beam to have 1″ sections. I went with the latter option.
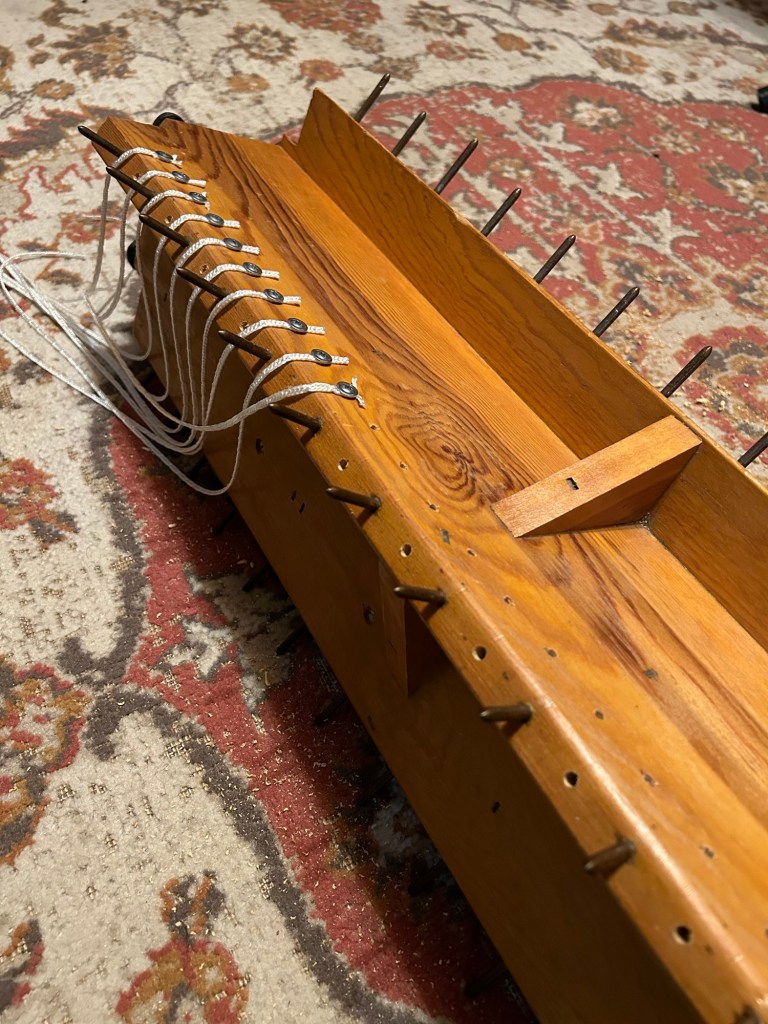
This involved drilling quite a few holes, which I was hesitant to do, but I decided it was about time that I make my tools work for me rather than me trying to work against them. This loom is 55 years old and part of me felt like I was destroying it, but I had to keep reminding myself that it’s mine, it’s a tool, and I was making it more functional for what I need it to do. After drilling 200 holes, installing makeshift pegs to separate the sections, and attaching cording to tie on each bout, I was ready to go. I also had to lower the placement of the warp beam on the frame of my loom to accommodate the longer dowels I used as separators so it could turn freely without hitting the back beam that runs along the top.

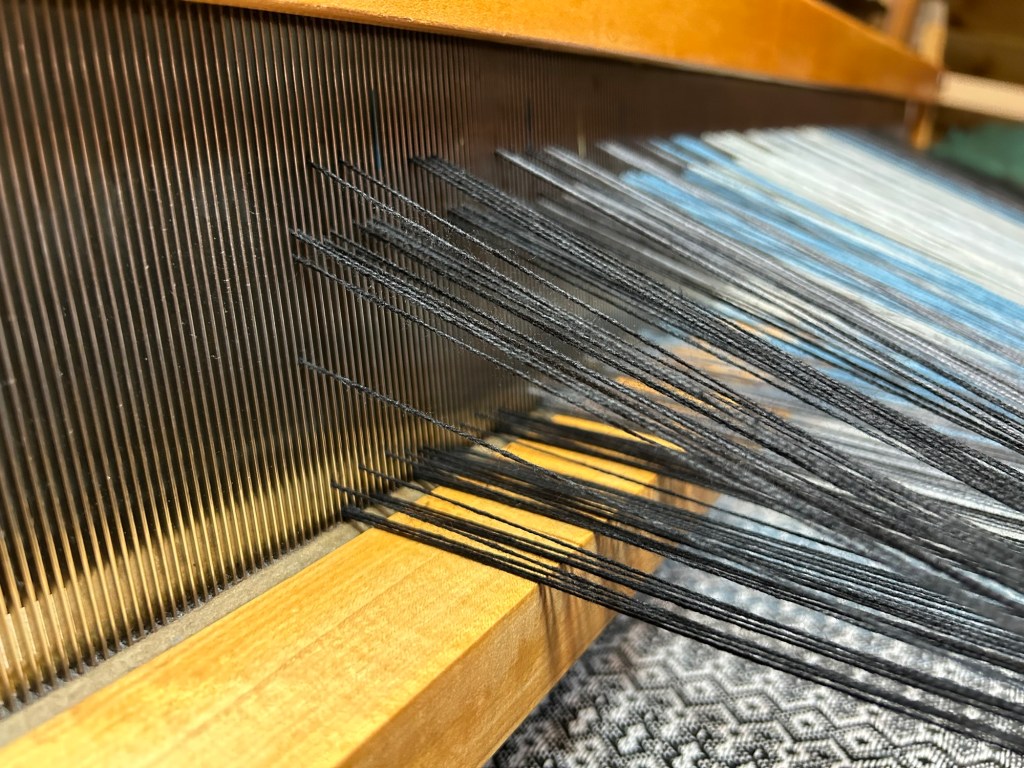
Once all of that was sorted out, I could move forward with threading the warp ends through the tension box and onto the loom in 1″ sections.
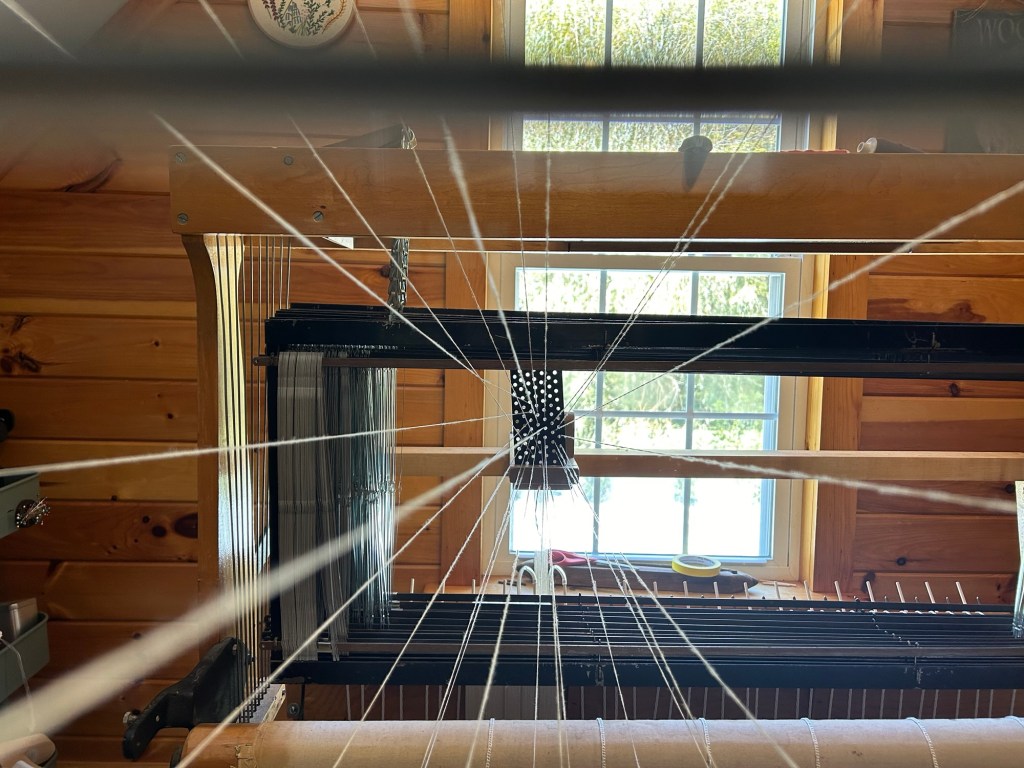
By threading the warp ends over and under the dowels on the tensioner, it creates a bit of resistance and keeps all of the ends taut and under the same tension. The spacer then holds all of the ends at the correct width for winding on. Section by section, I moved across the warp until I had the full width wound onto the loom.
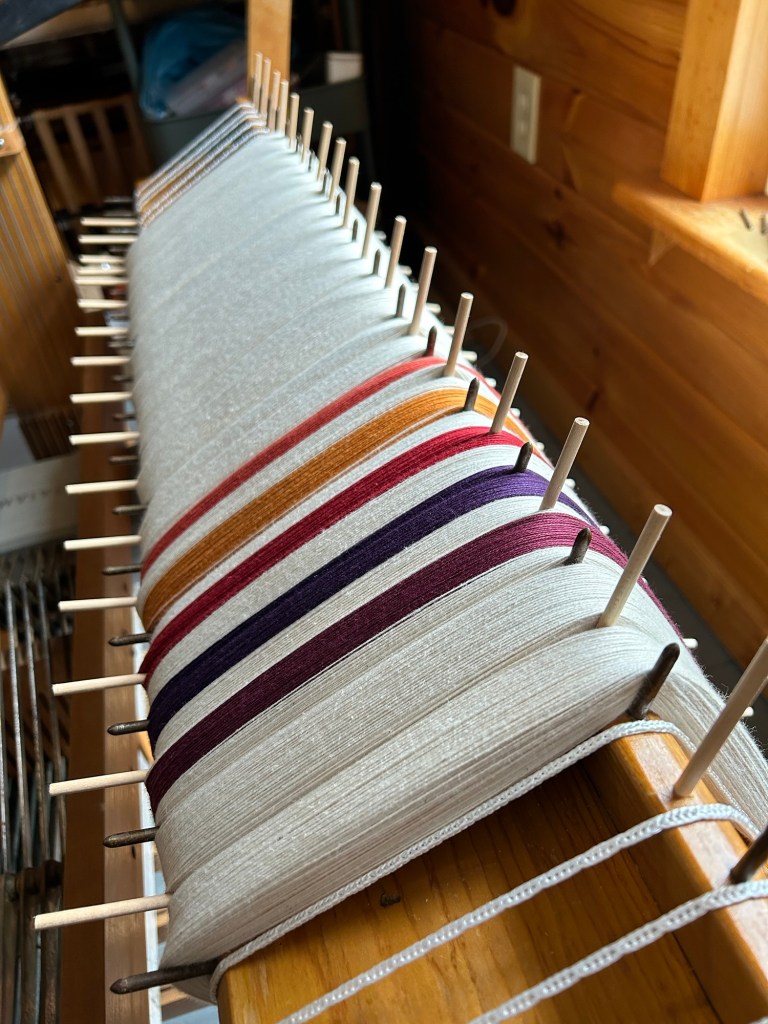
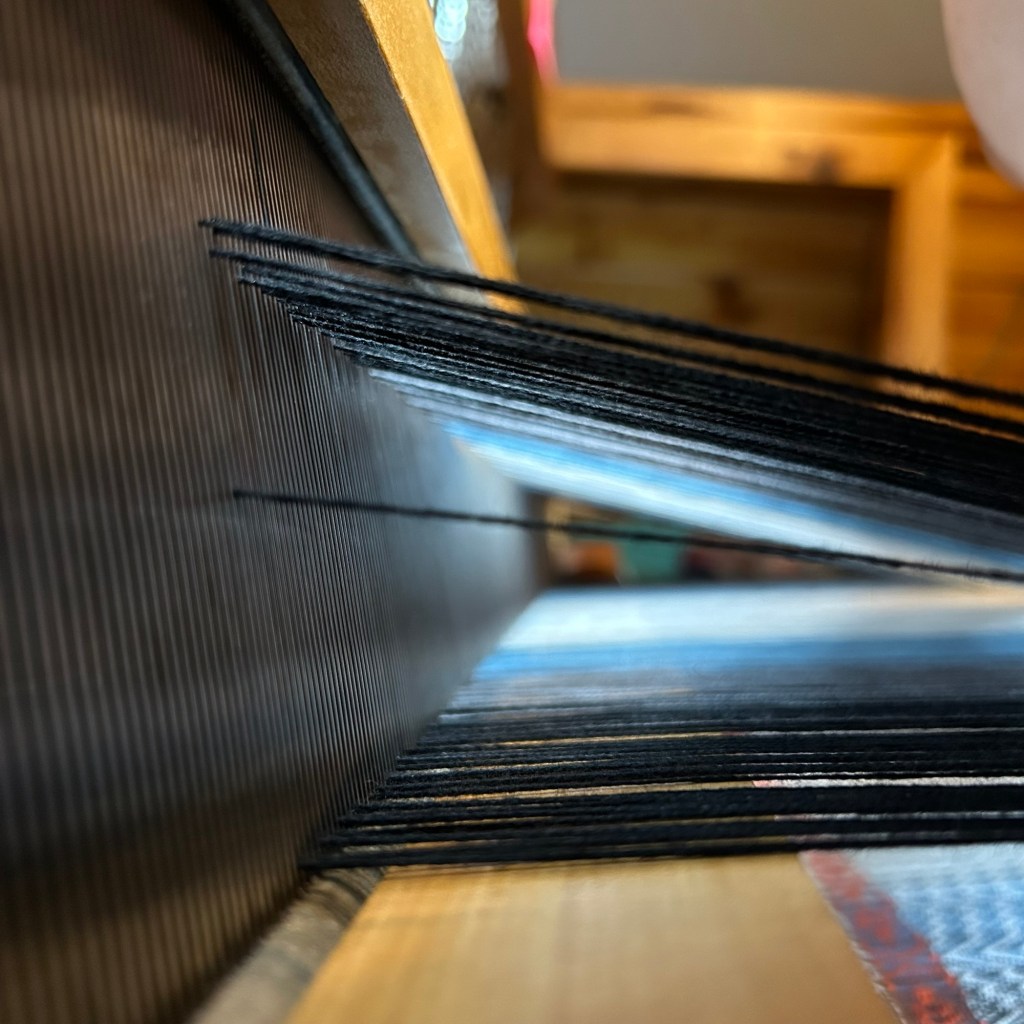
What a beautiful sight to behold! At this point, the rest of setting up the loom is the same as it would be if you aren’t warping sectionally – threading the heddles, sleying the reed, tying on to the cloth beam in front and spacing the warp to begin weaving. I was worried I would get sick of weaving 40 of the exact same thing, but I could have kept going. And I already have my next two warps planned, which means I have several more months of weaving to keep me busy.
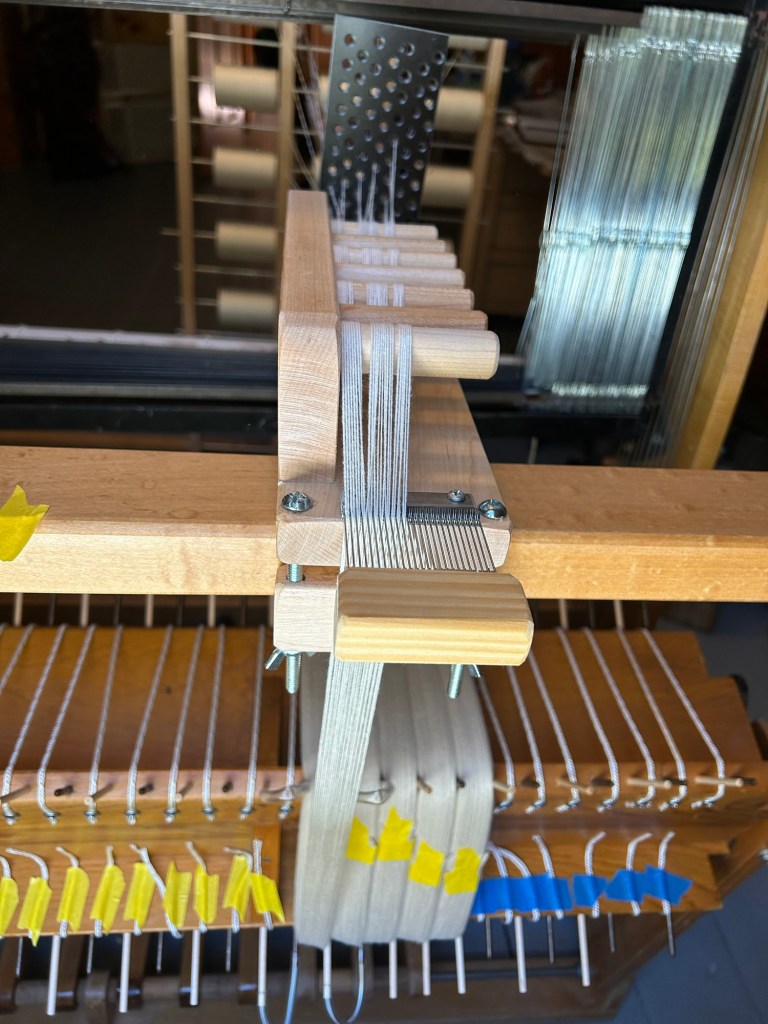
While I was making improvements to my loom, it was also time for me to fix another thorn in my side that, up until this point, I had just done my best to ignore. I bought my loom used from a woman who had refurbished it, and who had cobbled pieces together from various looms to get one complete set. Mine is a 10-shaft loom, each shaft being raised by levers at the top of the castle.
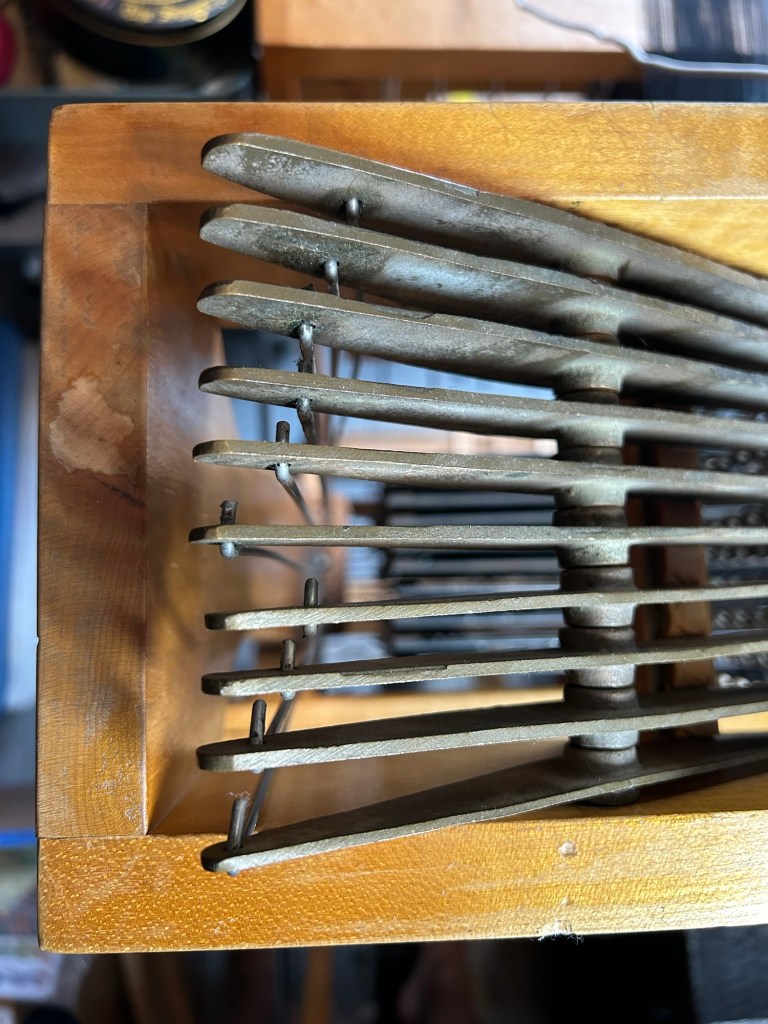
The wires connected to each of the levers are pulled down when I step on a treadle, thus lifting the other side of the lever up and raising the shaft with it. On this make of loom, from front to back the wire should get closer and closer to the fulcrum of the lever in order for the shaft to be raised to the appropriate height. As you can see in the above photo, these are sort of but not really following that logic. It’s because the levers are cobbled together and not the correct pieces (the other side was even worse). What this resulted in was an unclean shed, where warp threads were all raised to varying heights. The “shed” is the opening in the warp through which the weft shuttle is passed to make fabric. The unevenness of my shed made it really easy to skip threads – go over some that the shuttle should have gone under, or vice versa – which made for constant vigilance and time-consuming fixes if I happened to catch a mistake in time.
The levers for the first four shafts on each side of the loom were correct, so I ordered new levers for shafts 5-10. Once installed, the difference was shocking.
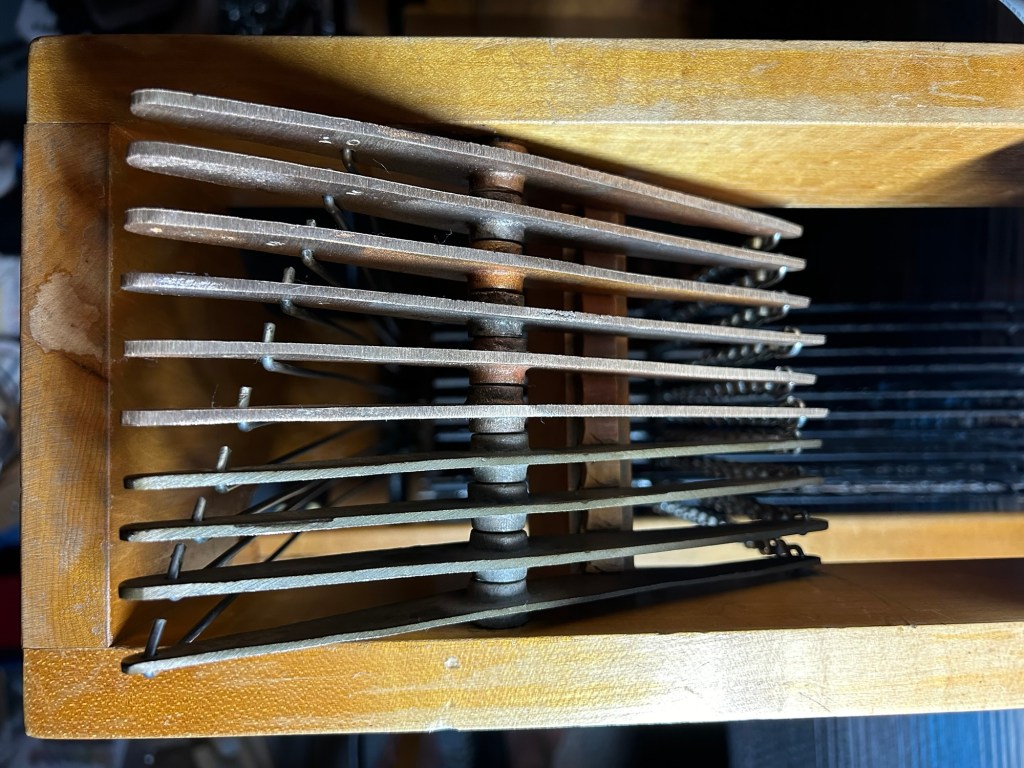
A neat diagonal line from front to back that makes my heart sing, and the most beautiful shed you ever did see.
I’m so glad I’ve taken the time, and made the investment, to do some of these improvements. They’re only going to help me in the long run by making every step of the process more enjoyable. After all, that’s what it’s all about.
Coming soon, real live knitting content! I can scarcely believe it myself. Come back soon to see what I’ve been working on when I’m not sitting at the loom.


Leave a comment