When we last encountered our determined crafter, he was three weeks away from attending a wedding for which he had no shirt, no waistcoat, no pants, and no gift. With only seven days to go, will all the details fall into place, or will he be left scrambling at the last minute searching for a department store in Pennsylvania over Labor Day weekend to find an outfit? Let’s check in with him now to see what progress he has made.
Y’all, this Cinderfella is going to a wedding! In my last post, I had all of the pattern pieces cut out for my button-up shirt and had just begun the sewing process. I was a little concerned about a few of the techniques that were new to me, but once I got started the shirt came together fairly quickly.
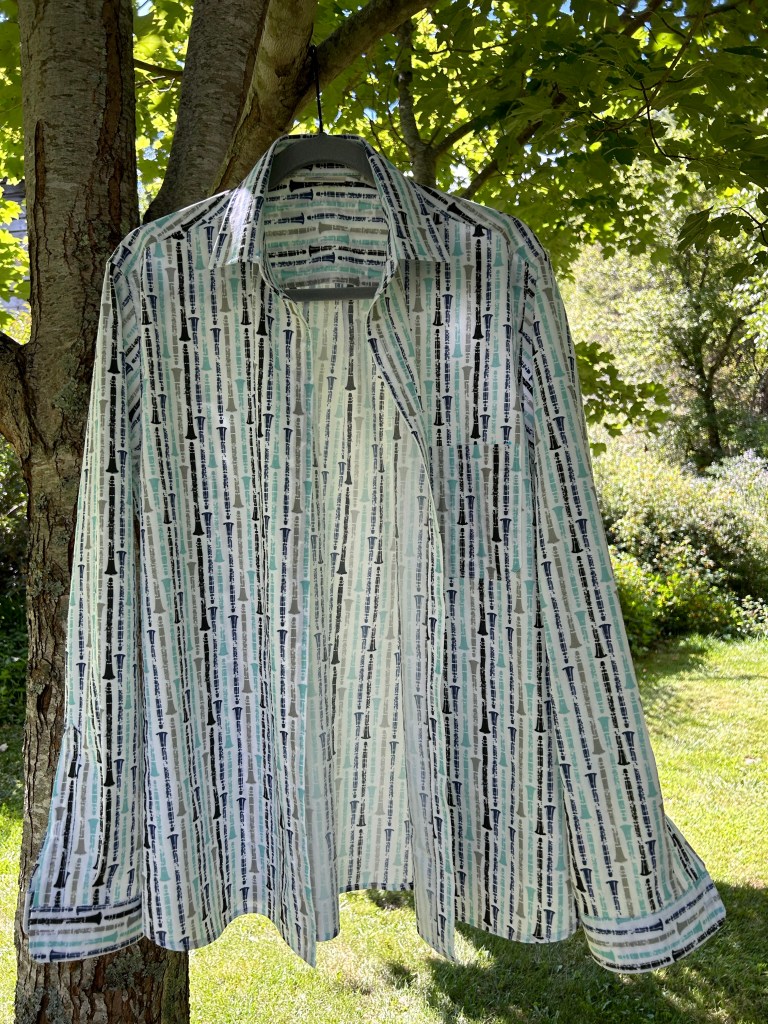
I’m really happy with how this turned out and I think it might be the best-fitting shirt I have made so far. This is the first time I have used this pattern and I did have to make a few adjustments to the sizing, but I like the way it fits. I added 2 inches to the sleeve length and I actually think that adding one more inch would have been perfect. I also toyed with the idea of adding an inch to the body for a little extra security against it becoming untucked when sitting down or reaching up for something, but it’s fine as it is. I did make that note for next time, though. Adding length to the body felt like it would have been such a task and would involve adjusting four separate pattern pieces, so I thought I would let it slide for this one. The only remaining step is to sew buttons onto the shirt, then with a final press it will be completely done! I will share more details about this project once it is completely finished and after the wedding next weekend. I’m feeling much less stressed now that it is (practically) complete.

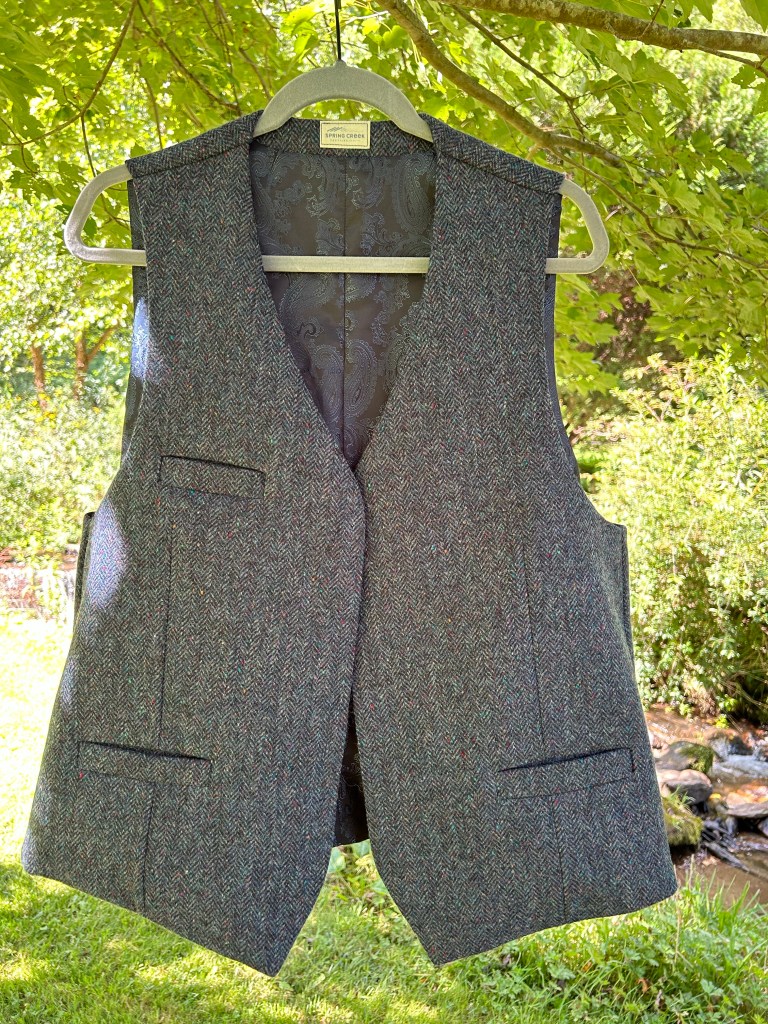
With the shirt done, I was finally able to direct my attention to a waistcoat. I won’t lie to you, I was really intimidated by this project. The pattern I used was for a fully-lined waistcoat with side vents, darts, and three welt pockets, all of which I have never done before. On top of that, I was planning to sew this waistcoat with some really beautiful (and not inexpensive) wool fabric woven in Great Britain, which I then purchased from a retailer in Canada, so the stakes were high and messing up would be costly.
After comparing my body measurements to the pattern, I realized I would have to combine a few different sizes to get a good fit. If I used the size that fit my chest, the waist/hips would be too small. If I used my waist measurement, the chest would be too big. So I hunkered down and retraced my pattern pieces to fudge a few measurements and do some grading between sizes before cutting out my muslin so that I could get it just right. I slapped the pieces together very quickly to check fit and felt like I did pretty well with the fit around, but the length needed some significant adjustment. I wasn’t sure where to go from there because a) I didn’t have any muslin left to cut out new, longer pieces to try again and b) I had no clue what I was doing! So I ignored the muslin for a few days and focused on other crafts instead. The clock was ticking, though, and I knew I would have to come back to it eventually.
Once I had taken a mental break and come back with a fresh mind, I found a long strip of scrap fabric that I was able to sew on to the bottom hem of my muslin to add length and figure out exactly what adjustments I needed to make. My previous measuring while wearing the muslin made me think I would have to add up to 4″ to the body, which was such a large adjustment that I doubted myself and was hesitant to move forward. After adding the extra strip to the bottom, trimming things up and trying it on again I ultimately decided that 2.5″ would be enough. If I thought adjusting four pattern pieces was too much to deal with for my shirt, imagine my excitement at having to adjust EIGHT pattern pieces for the waistcoat. But after several evenings of preparing pattern pieces, cutting out fabric, and sewing seams I somehow ended up with something wearable and shockingly decent-looking!
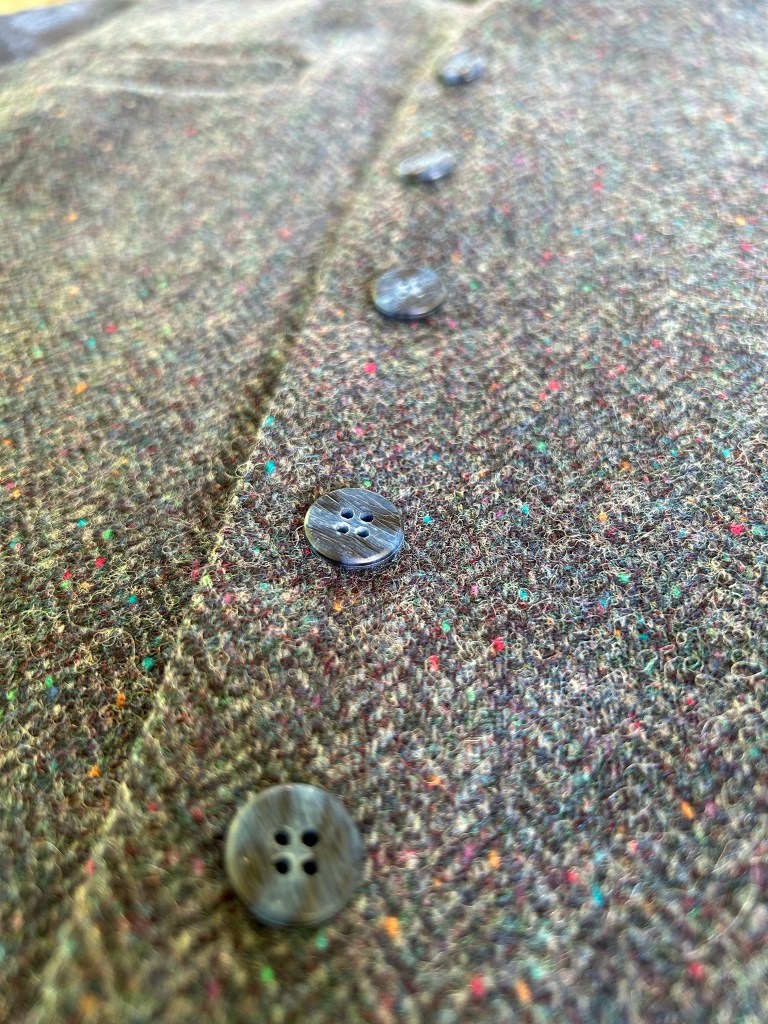
Whenever I sew a project, I always take notes in my sewing notebook about what fabric I used, adjustments I made, and what I would do differently next time. The two most obvious things here for next time would be to a) put that breast pocket on the other side of the waistcoat where it belongs!! (not that I’m upset about that or anything), and b) sew the label lower on the back of the neck (and also just do a better job sewing the label on in general). Next time I make a waistcoat, it is going to be just right.

All things considered, I’m really happy with the way this turned out! I hate being prideful, but I have to say that every time I look at this hanging up I can’t believe that I made it myself! As you can see, this project also still needs buttons as a finishing touch, but the buttons I ordered just weren’t doing it for me. They were a little smaller than I expected, and looked so much cheaper in person that I couldn’t bring myself to commit to using them for this project.
They just didn’t elevate the project in a way that a good button pairing should. So my sweet, patient and supportive husband drove me into town today for some button hunting to see what I could do. The options are Michael’s and Walmart so we’re not talking high-end button shopping here, but I think I found something that will work, even if just temporarily so that I can attend this wedding fully-dressed. I’ll share the final button choice in my next post. Now I have to bite the bullet and add some button holes and I hope I don’t mess that up too badly. What I didn’t mention about my shirt above is that I had to rip out and re-sew almost every single buttonhole at least once. I’m really hoping I don’t have to do that here as well because using a seam ripper on wool is tricky and ripping out stitches on the lining fabric is not forgiving. Wish me luck! I have a week to get the shirt and waistcoat completely finished. I have also gotten my pants situation sorted out and my wedding gift for my friend has arrived, so I’m sitting in a good spot now.
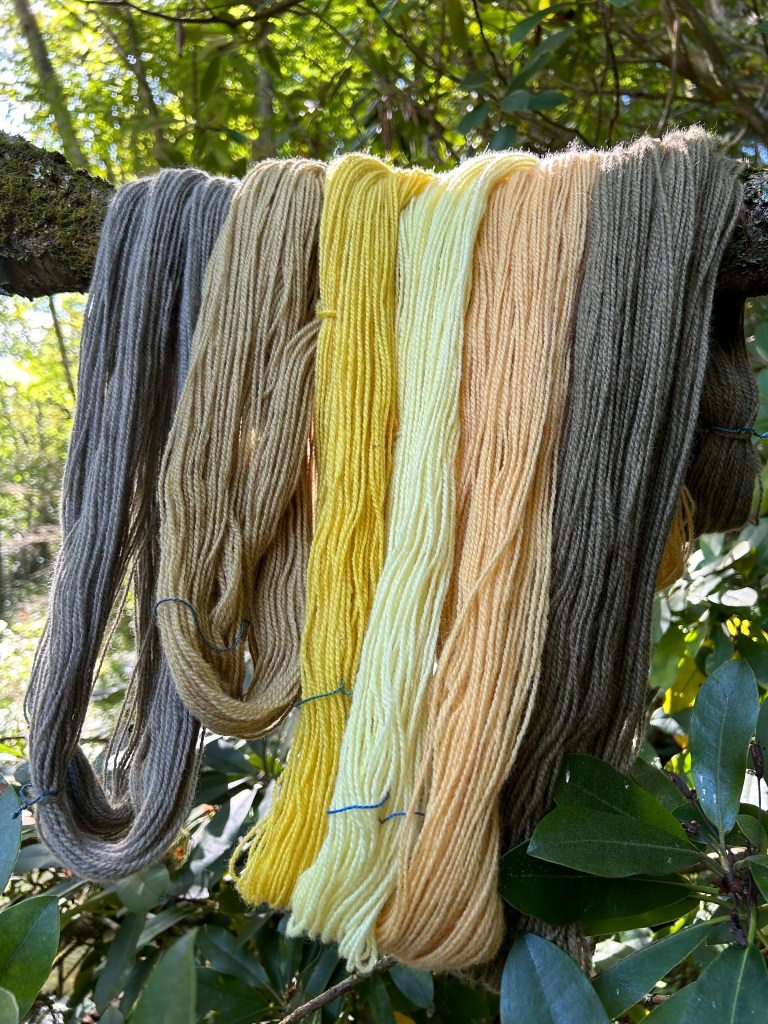
But what did I do while I was avoiding my waistcoat muslin and feeling paralyzed by the uncertainty of adjustments I would need to make to the pattern? I turned to yarn, of course. I continued my exploration into natural dyeing with a few more skeins and am really pleased with the results. The first skein was done using rhododendron leaves, which I had read would give a neutral gray if modified using iron in the dye bath. Gray is my comfort zone, so that piqued my interest. Before modifying the color with iron, it was a little unsettling to see that the leaves were giving nothing more than a light beige. I thought for sure I had failed in my pursuit.
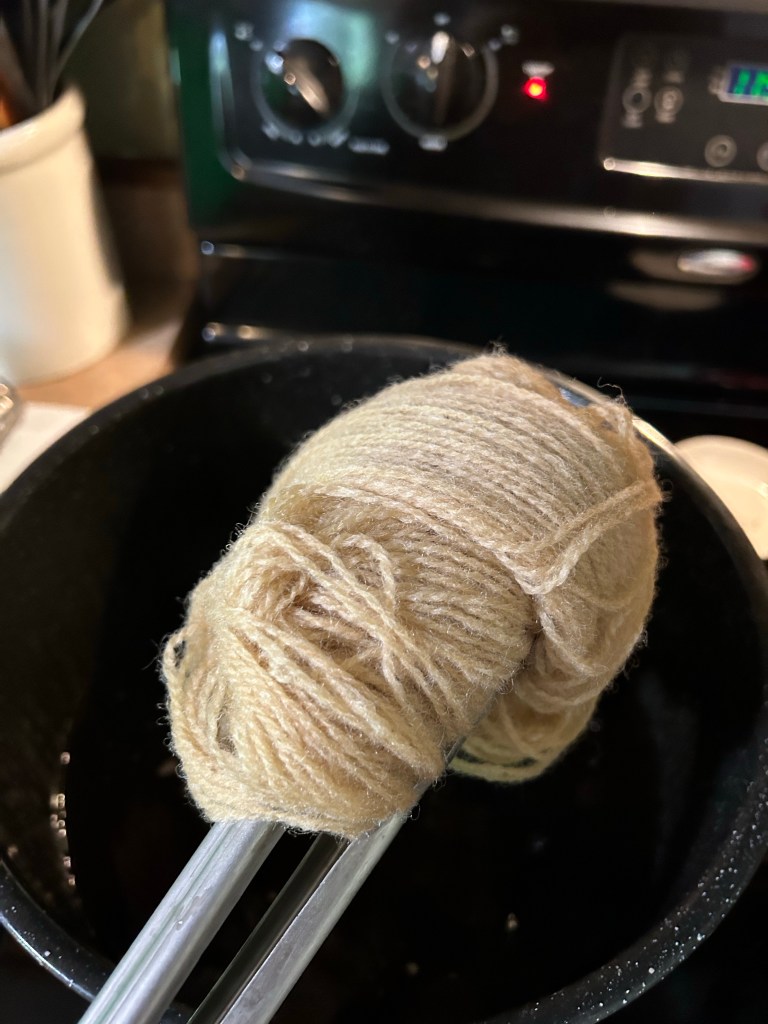
But I channeled my inner Katie and told myself to keep going, that this was just an experiment! See what happens. So I added some ferrous sulfate to the dye bath and let the yarn soak for 20 or 30 minutes to see what would happen. Et voilà!

A lovely, wonderful neutral gray appeared. Now, rhododendron leaves are mildly toxic and I was careful not to breathe in any fumes as I simmered the leaves in the dye pot, but I do love this result. I suspect that there is no real dye in the leaves, but instead a fair amount of tannins, which are present in many many plants. I have since read that adding iron to tannin-rich water will give you a neutral gray, regardless of the source of tannins so I will be curious to see if I get the same result using things like acorns, or leaves from other trees. The color above is a little washed out – in person it is a bit darker, as you can see in the photo below. This skein is on the far left.
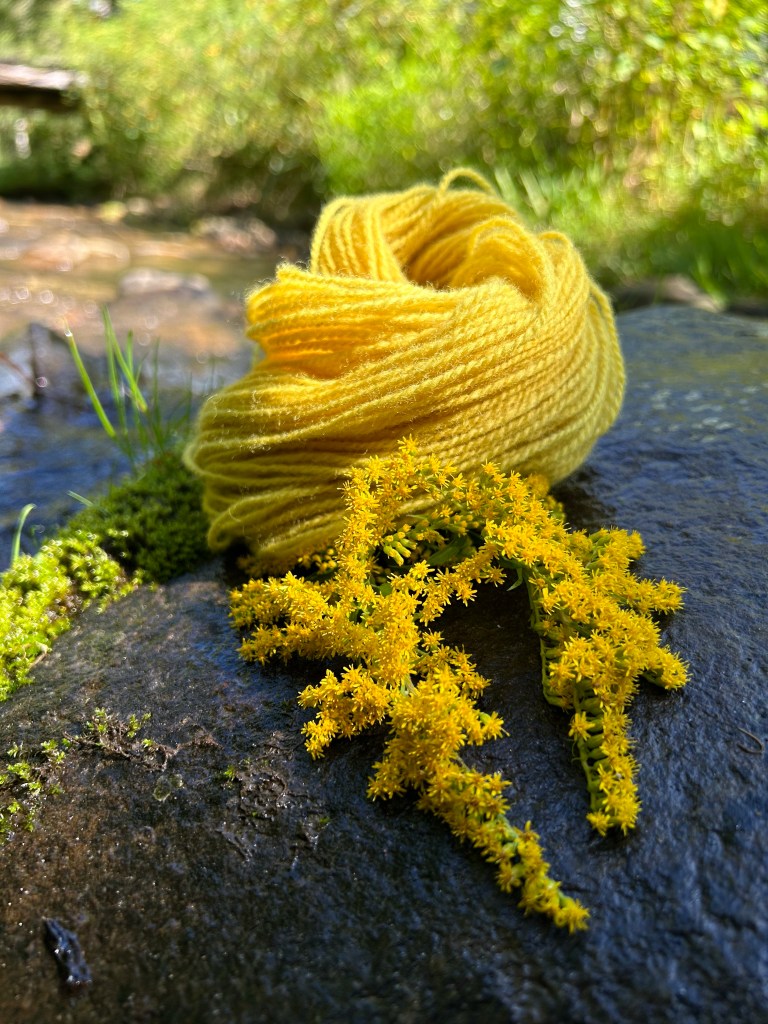
The second skein I dyed was using goldenrod, which is now in bloom. Goldenrod, like Queen Anne’s Lace, gives a nice clean yellow, but I had read that goldenrod gives a stronger color and, if simmered longer (an hour vs 20 minutes, for example) it shifts towards gold. Well Rumpelstiltskin, eat your heart out!
These two colors used up the last of this particular yarn base that I had (Rauma Finullgarn for those who are curious), but I have plenty more undyed yarn in different bases to experiment with. For now I get to look at this beautiful palette of natural shades and dream about colorwork hats and cowls to knit during the winter months as I think about blooming flowers, flowing water and warm, sunny days.
This past week I also managed to ply and wash the two bobbins of singles I had spun. The Shetland wool that I had processed from raw fleece my friend gifted to me turned into a really lovely skein of 3-ply yarn. This gave me about 318 yards that I would consider a sport-weight, plus a little mini-skein of 2-ply that I made with what was left on my bobbins because I did a horrible job of splitting the singles evenly for plying.

I am really looking forward to knitting with this yarn, and creating more in the future from the abundance of fleece I have stored away!

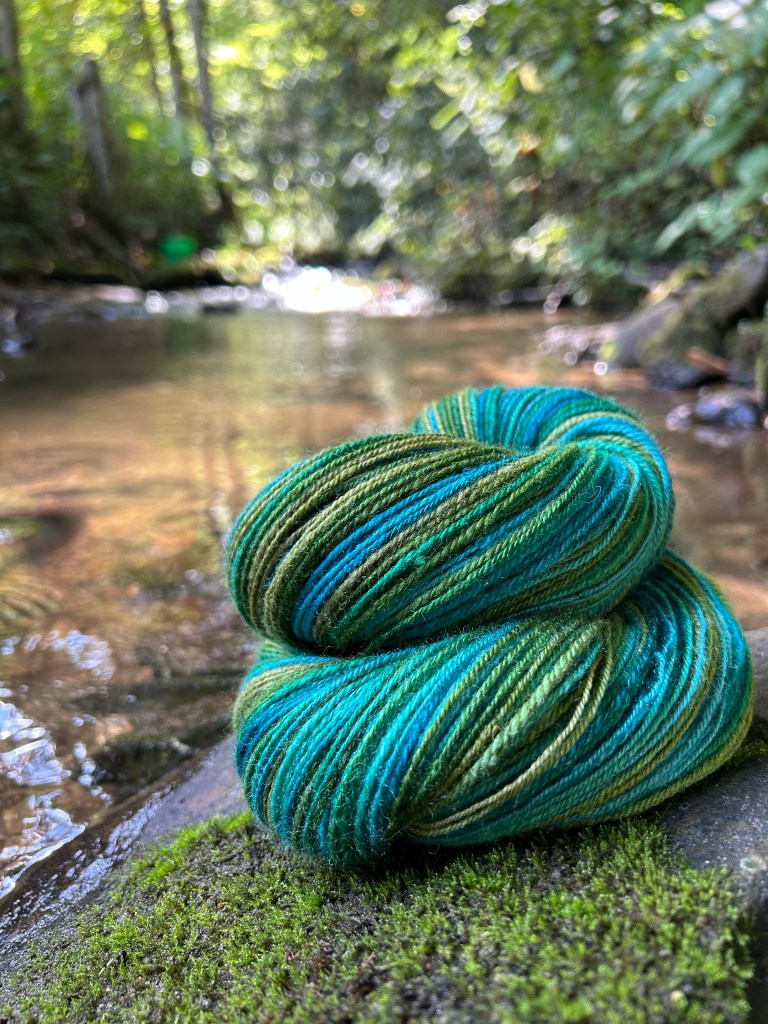
The other bobbin of singles I had spun up was a really colorful blend of BFL/silk that I also turned into a 3-ply yarn, but this time I chain-plied it to preserve the colors and create somewhat of a self-striping yarn.
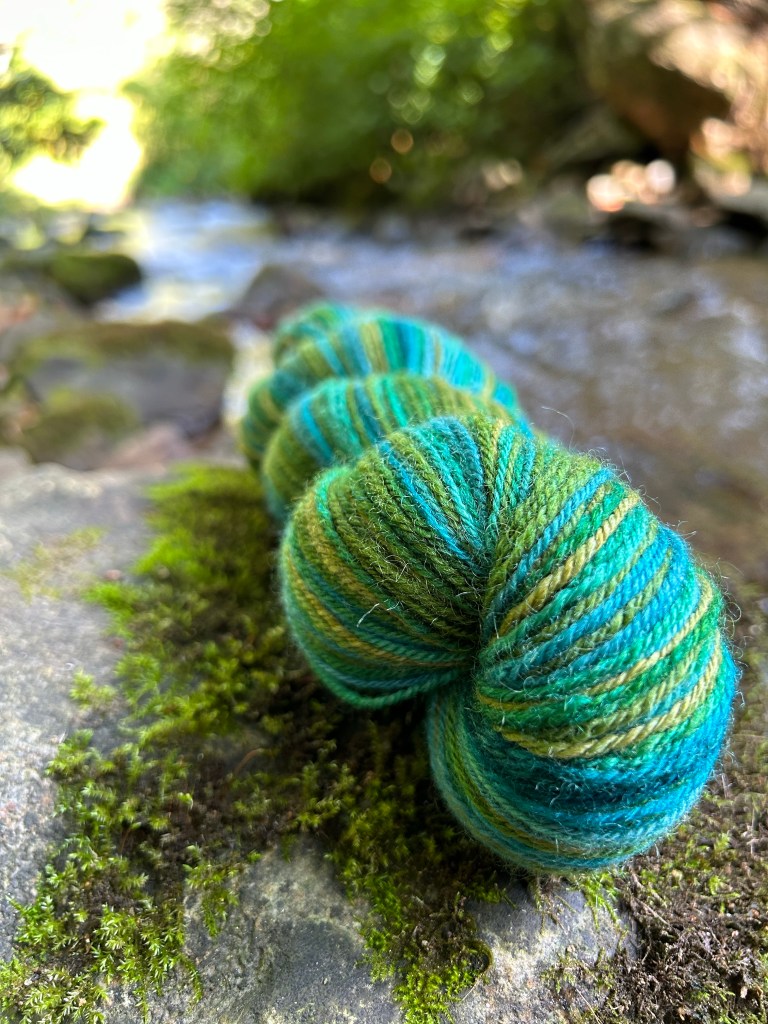
It’s hard to capture in a photo, but in person this yarn has a beautiful luster from the silk. There is so much color here that I am struggling to think of an appropriate project at the moment, but I am pleased to have another finished skein. This was 4oz. of fiber and came out to about 390 yards. I would consider this to also be around the sport-weight range. With these two skeins done, I don’t know what to spin next! I’ll have to go swimming in my fiber stash to see what speaks to me.
With all of the sewing and spinning I have been doing lately, my knitting has taken a back seat for a while, but I did knit a few swatches this week for an upcoming project. I designed a pattern for The Yarnery back in 2016 called Björklunden, meaning “birch grove” in Swedish and named after the northern campus of my alma mater, tucked away in Door County, Wisconsin. I was recently asked if I would be willing to knit a new sample with different yarn, and of course I said yes! I am already loving the fabric that this is creating and can’t wait to knit a large wrap with this stitch pattern.
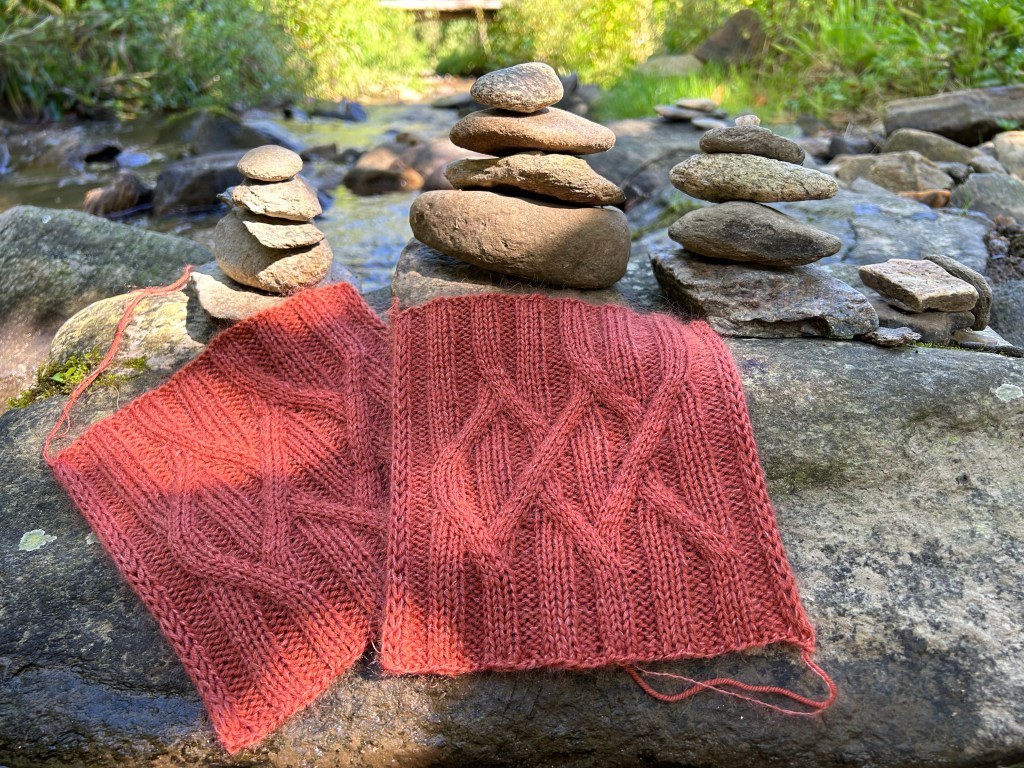
Can you see the birch trees? Tall, straight trunks with branches criss-crossing in the canopy. This project will be my hotel knitting next weekend while I am in Pennsylvania and I am looking forward to making some progress on that front. Before I get to that, though, I have some buttons to deal with. I better stay focused and get started on that.
I hope all is well with you, and until next time, stay creative!


Leave a comment