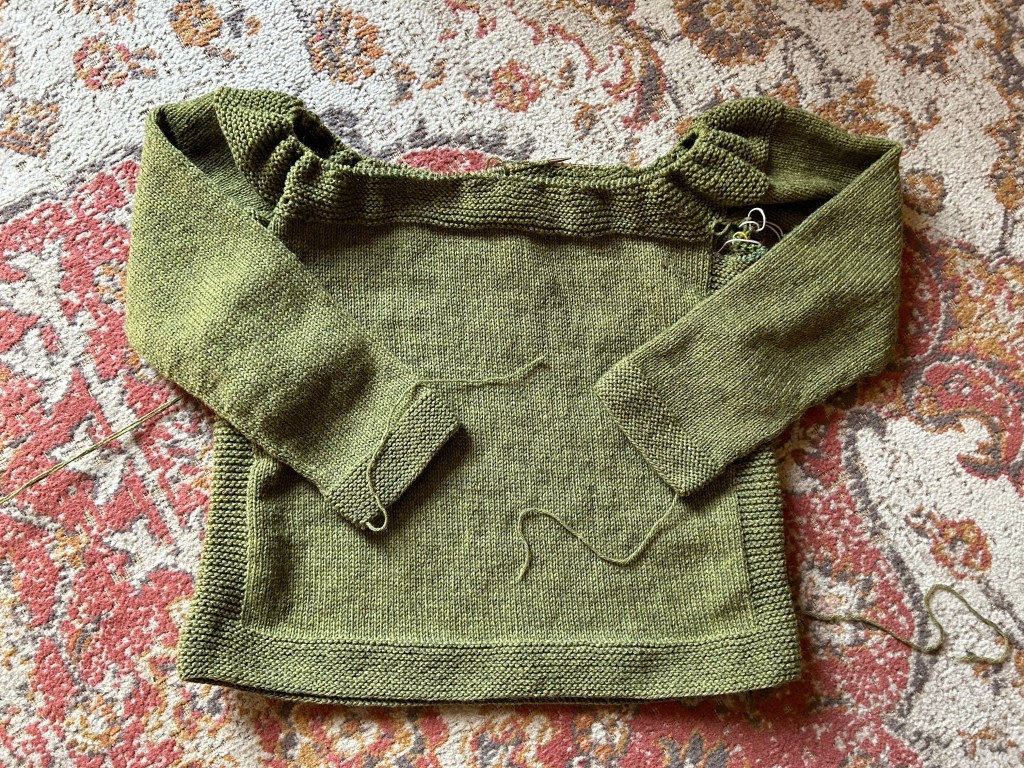
As I work my way through this “recycled” sweater – you know, the one I shrank in the washing machine 15 years ago and then ripped out the felted yarn and am finally back to knitting the same sweater again – I started to really worry that I was going to run out of yarn. I had alluded to this in a previous post, but at that point I was in the “ignore that voice in the back of your head and keep going as if there isn’t a problem” phase of the project journey. However, I was approaching a critical decision point as I reached the underarms for the body and the sleeves, at which point the pieces are joined together to knit the yoke up to the neckline. Knowing that if I were to introduce new yarn into this project that the dye lot would be impossible to match, the point where the yoke joins the body and sleeves together would be the perfect place to mask this addition. The fabric texture changes from stockinette stitch to garter stitch for the yoke, and this textural difference would be perfect to hide any mismatch in color.
There were a few additional complications that came with the idea of adding new yarn to this project, the first being that the old yarn had already been knitted and felted, thus potentially changing the gauge and quality of the yarn significantly. The second complication being that Cascade Yarns moved their yarn production from Peru to China in 2014 or 2015 and I have been acutely aware that with that move, there is inevitably a change in the quality of the yarn as well. As the original yarn was purchased in 2007, this could some into play as well.
I did end up purchasing additional yarn just to be safe, and rather than knit as far as I could with the old, felted yarn and then adding the new yarn in wherever that happened to be, I wanted to be a little more intentional about it so that it would not be a blatant texture or color change. However, I first needed to answer one final question: do I need to pre-felt the new yarn before I knit with it to match the old? I honestly did not want to have to bother doing that, so what you get here is a lengthy explanation of all of the work I did to figure out whether I could be lazy or not, which in the end was probably even more work than just felting the yarn to begin with. But a bit of yarn science never hurt anyone, and it allows us to explore a mystery term that sometimes gets thrown around in the yarn world: grist. Be forewarned, the rest of this post is very scattered and will be incredibly boring unless you think about yarn as much as I do.
Grist, in the simplest of terms, is a measure of how dense yarn is. We don’t always talk about this when considering yarn for knitting, but grist plays a significant role especially when it comes to yarn substitution. We often think that gauge is the most important metric to match when choosing yarn for a pattern, but the grist of the yarn you are using can be the difference between a sweater that is light and cozy and holds its shape well, and a sweater that is heavy and sags and seems to grow longer and longer throughout the day. If you have a ball band in front of you, the grist is right there for your consideration, expressed as a measure of length x weight, i.e. 400 yards per 100g. In the weaving world, or in yarn manufacture, this is often more frequently expressed as yards per pound – ypp. Fiber content as well as the yarn structure can significantly impact grist. Alpaca is a much heavier fiber than wool, whereas silk is nearly weightless. A smooth, compact worsted-spun merino will be denser than a woolen-spun, carded merino. And in my case, the question I wanted to answer was: by felting my yarn, did it impact the grist? We know something must have happened because the overall project shrank in size, but did the yarn get skinnier? Did it get shorter? Is it more compact now? First, a visual inspection.
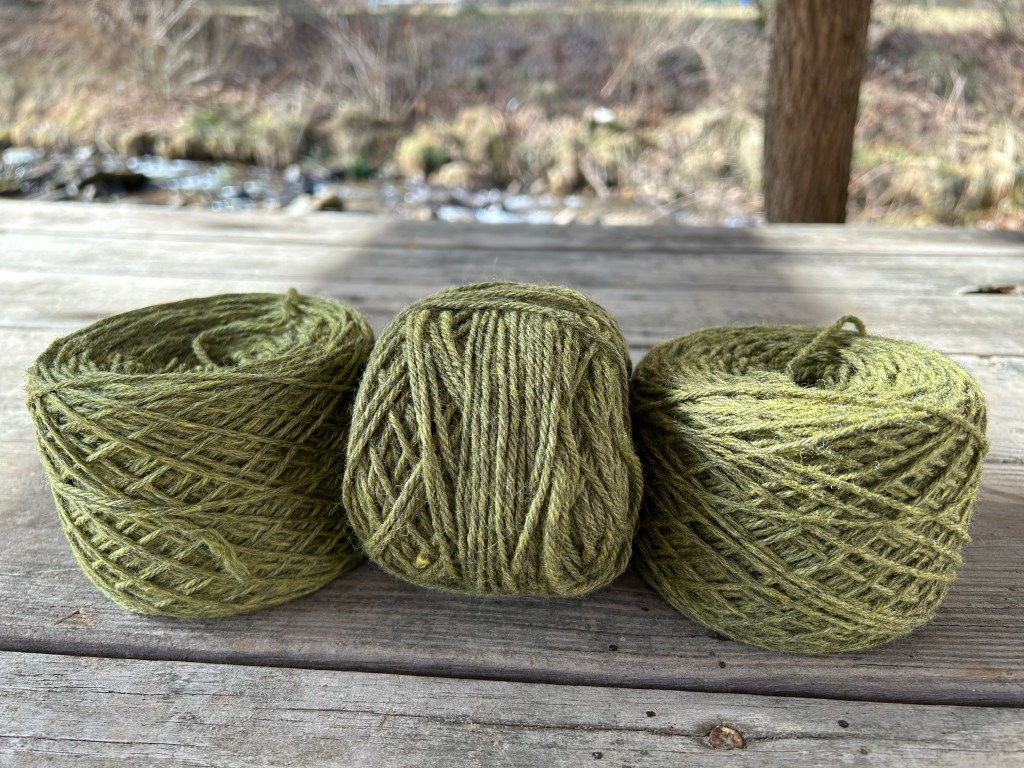
On the left, we have the new yarn produced in China. In the middle is a ball of the old yarn I found in my stash that was left over from the original sweater and therefore has not been knitted or felted, produced in Peru. On the right is a ball of the old yarn, felted. To my eye, and to my hands, the new yarn feels like it has less “life”, which we often attribute to yarn that has a certain amount of bounce to it. This partly has to do with the fiber used (and the inherent crimp structure of that particular wool), and partly to do with how the yarn was spun. The new yarn is not as springy or plump as the old Cascade in the middle. And the felted yarn on the right of course appears to be fuzzier because knitting, wearing, and felting the sweater inevitably allowed a lot of the fiber ends to work their way to the surface of the yarn. Already of these three options, I like the new yarn the least. It is coarser, has quite a few more guard hairs (stiff, brittle fibers) that I have to pull out as I go, and it doesn’t have the same pleasant hand do it that the other two do. But this is all personal opinion. How do these compare in other ways?
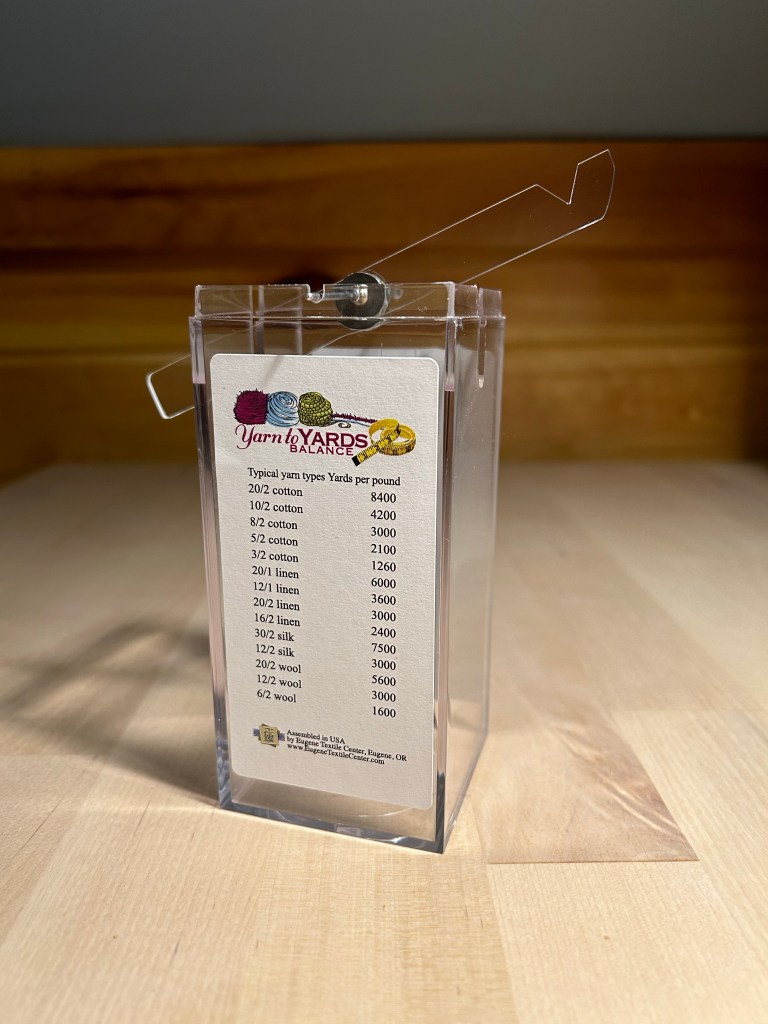
Enter the McMorran yarn scale, or as the label says, the “yarn to yards balance”. (A quick google search tells me that it used to be called a McMorran balance, but that brand is no longer available). This scale is used to determine the grist of the yarn. You cut a length of yarn and hang it off the end of the balance, clipping away at the yarn bit by bit until the scale is even. Then you measure the remaining length of yarn in inches, multiply by 100, and that gives you the yards per pound measurement.
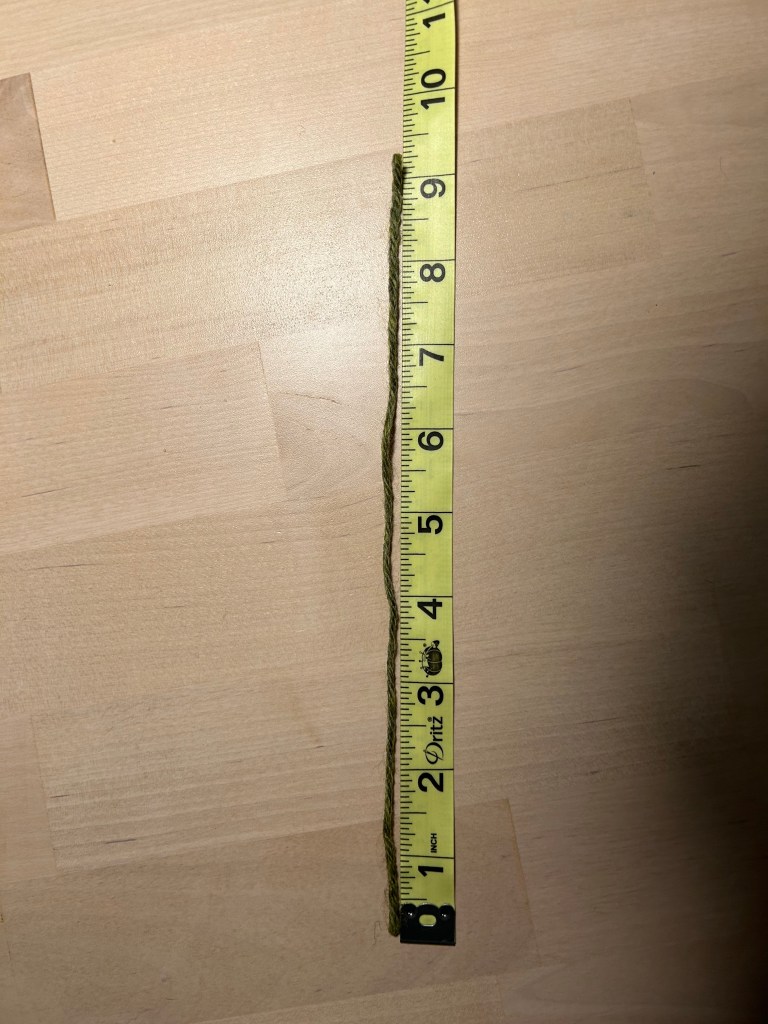
This gives us one piece of the full picture. Generally we can assume that a longer piece of yarn off the balance means that the yarn is skinnier – one pound of wool spun to a fingering-weight thickness will yield more yardage that one pound of wool spun to a worsted-weight thickness. This is only true if all other variables are equal – fiber content, preparation style, spinning technique, ply twist, etc. but look what we have here:
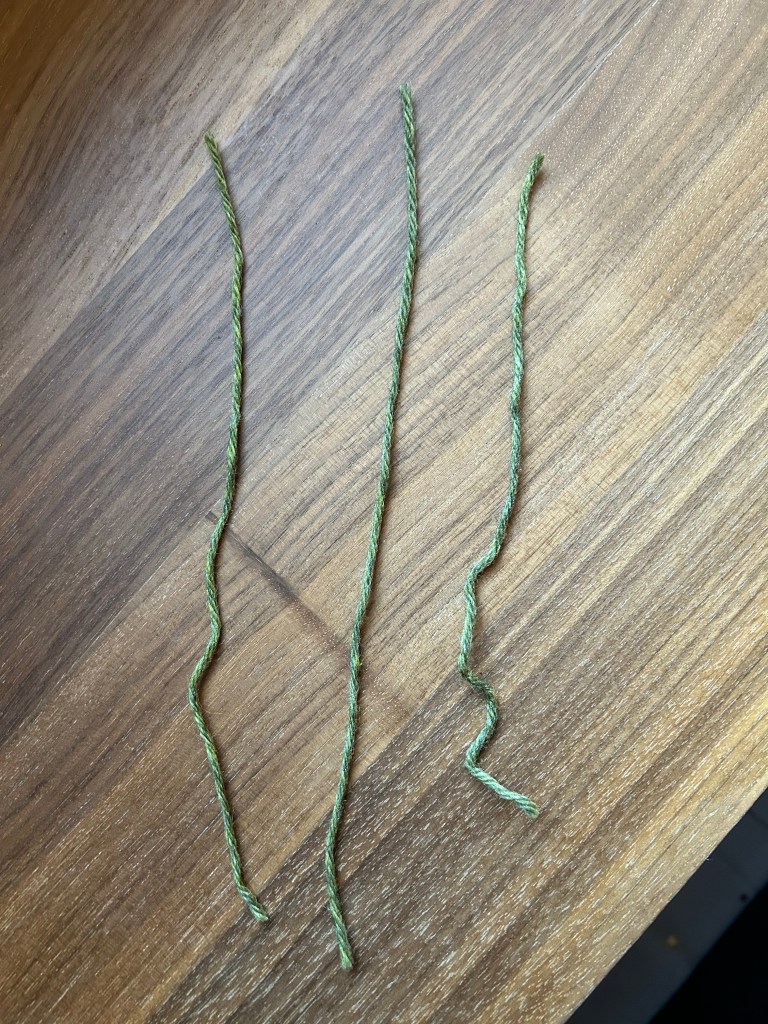
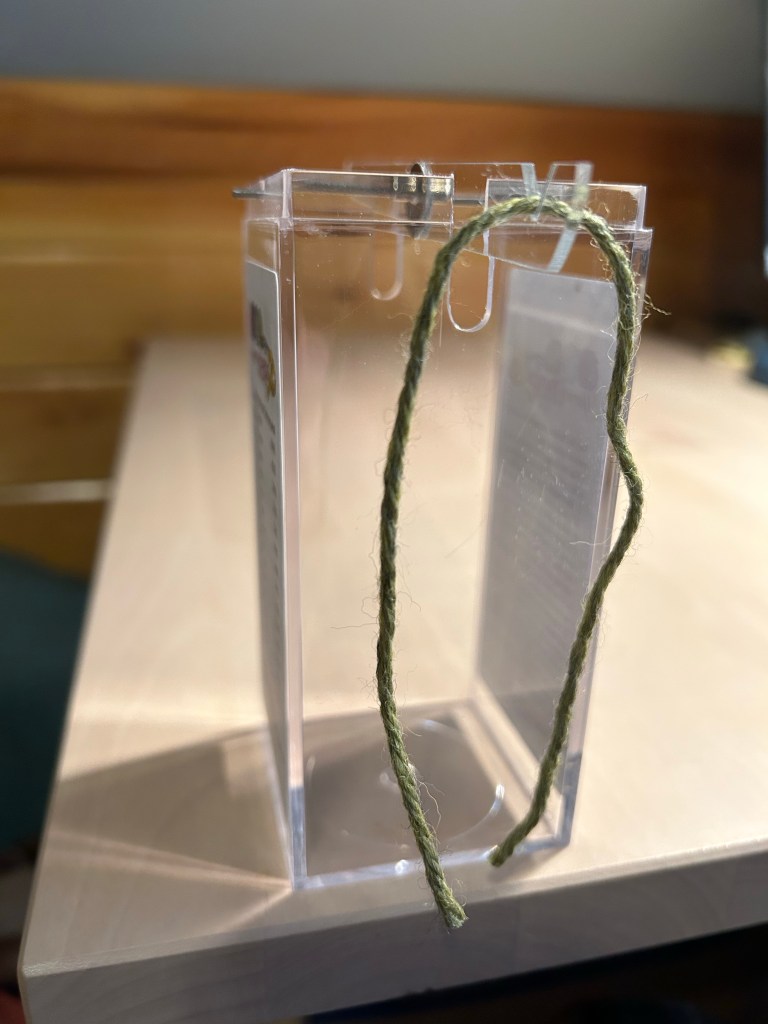
On the left, again, is the new yarn. In the middle is the old yarn, and on the right is the felted yarn. Three different lengths. Each strand weighs the same, so if we apply the math above that means the new yarn has an average yield of 925 yards per pound, the old yarn 1006ypp and the felted yarn 862.5ypp. The first conclusion, then, would be that the felted yarn is the thickest and that’s why it is shorter than the others, and the old yarn is the skinniest, resulting in the most yardage. But remember that grist takes into account the density of the yarn. To rule out the theory that one yarn is thicker than the others, the next step is to measure the wraps per inch, or wpi.
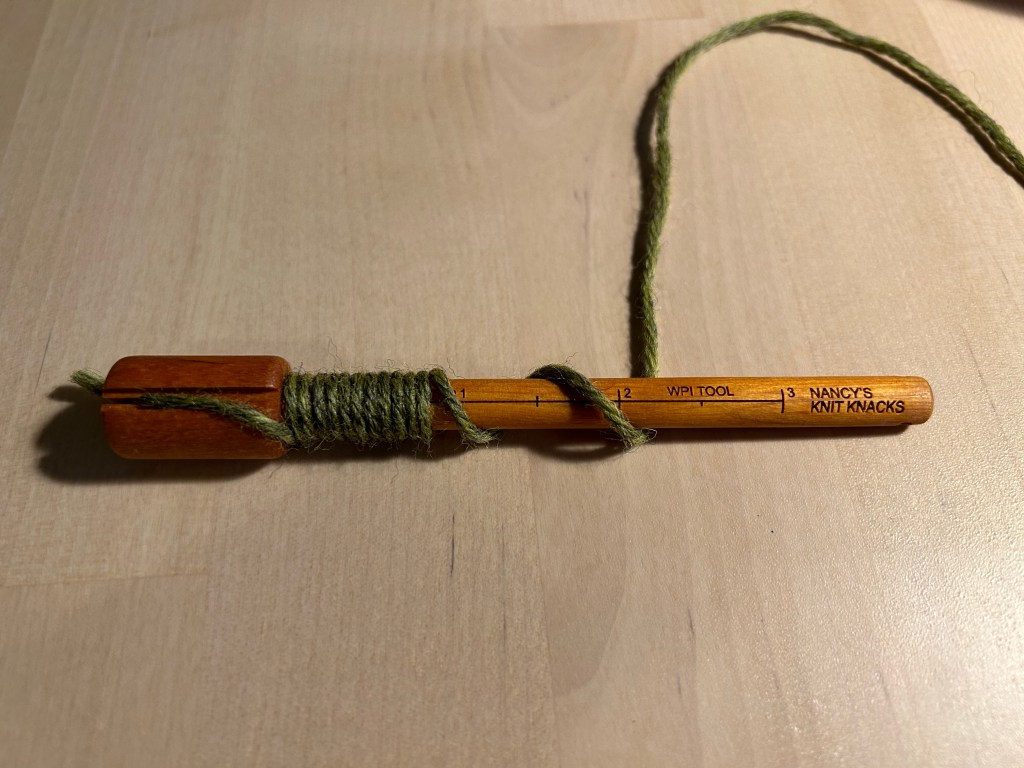
WPI is used in spinning, weaving, and (less often) knitting to get a general read on how thick your yarn is. This helps to determine the sett of a weaving project – how closely to place the warp ends on a loom (expressed as ends per inch) – or the gauge of a knitting project. To measure the WPI, you can use a ruler or a specialty tool to wrap the yarn until you reach the 1″ mark, and then count how many wraps you have made. Ideally when doing this, the wraps are laying nicely next to each other – not scrunched together, but with no gaps – and the yarn is wrapped without tension so that it remains unstretched. (Caveat here: some weavers advise to measure WPI with the yarn under tension to mimic how it will be once on the loom. Personally, I don’t, because to me the more important measurement is the fabric once it is cut off the loom and allowed to relax.) The result for all three of my yarns was 13 wraps per inch. Aha! So we know the yarn is all the same thickness (honestly, this was a surprise to me). That means that the grist is different, there is more fiber compacted into one of the yarns than the others and you guessed it – the felted yarn is more compact. This likely means that it shrank lengthwise, but not in circumference, resulting in the overall yardage being reduced while maintaining the same gauge.
What all of this told me was that if I want the grist, the density of the yarn, to be as similar as possible then I need to pre-felt the new skein of yarn before I knit with it. And so I did; I felted both the new skein, and the old (unknit) yarn I found in my stash so that they would better match the repurposed yarn I had already been working with. And this brings us to our final visual comparison.

I felted both of these yarns in the exact same manner, one right after the other. Hot water and agitation followed by a dunk into cold water to “shock” the yarn and encourage the scales on the wool fibers to close and grab onto each other, which is what causes felting. Then repeat a few times – hot water and agitation, cold water shock. On the left is the new yarn produced in China and you can see how jumbled and messy it looks. It is almost as if the blend of wool used to make this yarn resulted in some fibers felting more than others in a way that, to me, is somewhat unpleasant. The old yarn produced in Peru is still smooth and hangs nicely, all the yarn having shrunk pretty consistently.

Again, the new yarn is on top, old yarn on bottom both after felting. All in all, my personal experience and observations both with this project as well as countless other projects over the past 16 years using this yarn, I would say that the shift in production location did have a tangible and measurable impact on the quality of the product and I am not surprised that a number of yarn shops ultimately ended up dropping this yarn line from their inventory after the shift.
For this project, it is what it is and I am looking forward to being able to add this sweater back into my wardrobe, but I will likely find alternatives to this yarn for future projects. To work the new yarn into the sweater as seamlessly as possible, I began using it when I started the yoke and I am alternating it with the old yarn – one round new, one round old all the way up. This gives me the best chance of masking any difference in color, yarn texture, and as we have now thoroughly explored, grist.
Until next time, stay creative.


Leave a comment